Beginner’s Sourdough Bread
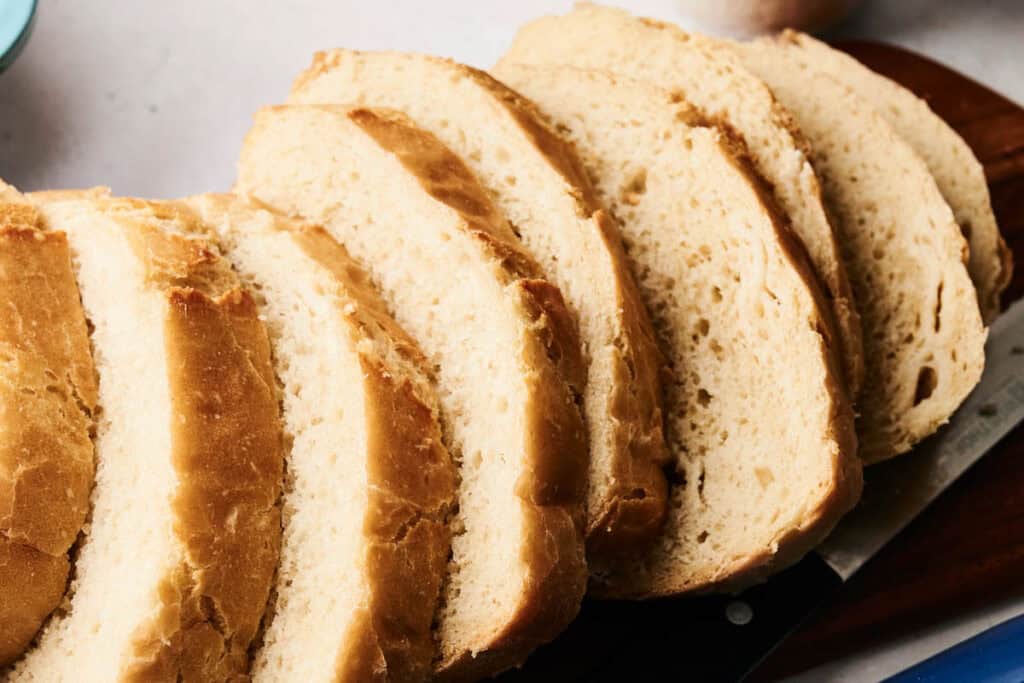
Sourdough bread is a little bit of magic—flour, water, and time come together to create a loaf with a crisp crust, chewy crumb, and deep, tangy flavor. There’s no need for commercial yeast; wild yeast and bacteria do all the work, giving your bread that signature sourdough taste.
This post contains affiliate links. As an Amazon Affiliate, if you purchase through those links, I earn a small commission. Thank you!
I love how this recipe lets me slow down and enjoy the process. The long fermentation builds incredible flavor, and there’s nothing better than pulling a golden, crackly loaf from the oven. Whether you’re baking your first sourdough or just looking for a reliable go-to recipe, this one delivers every time.
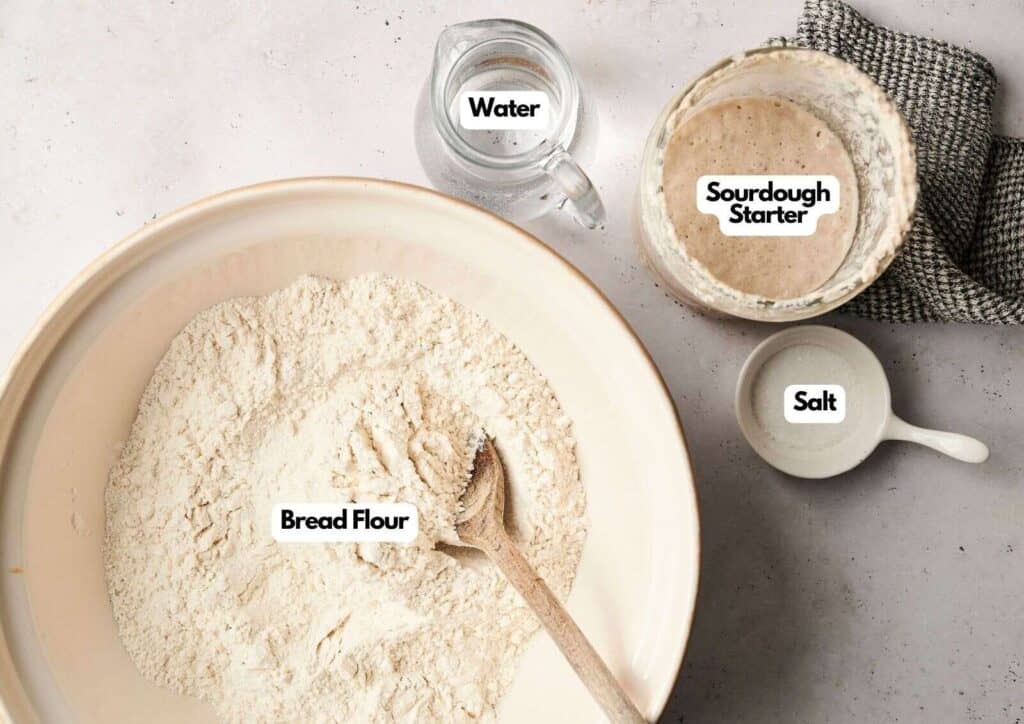
Ingredients You’ll Need
You’ll need all the ingredients in the photograph below.
How to Make Sourdough Bread
A complete printable recipe and the measurements in both US customary and metric are available in the recipe card below.
I love how hands-off this recipe is—most of the time is just waiting for the dough to do its thing. With a little patience, you’ll get a gorgeous, bakery-style loaf right from your own kitchen.
Mix the Dough
In a large bowl or stand mixer, combine bread flour, water, and an active sourdough starter. Stir well until all the flour is hydrated. Let the dough rest at room temperature for an hour—this step is called autolyse and helps develop gluten.


Add Salt and Knead
After the dough has rested, add the salt and mix for about 10 minutes. The dough will feel sticky, but that’s normal!
Bulk Fermentation
Lightly grease the same bowl and return the dough to it. Cover with a kitchen towel or plastic wrap and let it proof at room temperature for about 2 hours, or until it doubles in size.


Shape the Dough
Gently turn the dough onto a lightly floured work surface. Use wet hands if it’s too sticky. Shape it into a round loaf, tucking the seams underneath towards the counter to create surface tension.
Final Proof
Place the shaped dough into a greased Dutch oven. Let it proof for another 2 hours until it puffs up.


Bake the Bread
Preheat the oven to 400ºF (200ºC). Score the top of the dough with a sharp knife or razor blade, then cover with the lid and bake for 45 minutes.
Remove the lid and bake for another 15 minutes, until the crust is golden brown. Let the loaf cool completely on a wire rack before slicing. Enjoy!

Recipe Notes and Tips
I have a few tips to help you get the best baking results with this sourdough recipe:
- Flour: You can use all-purpose flour instead of bread flour, but the texture will be slightly different. Bread flour has more protein, which helps create a chewier crumb. If using all-purpose flour, reduce the water slightly to adjust for the lower gluten content.
- Use a strong starter: Your sourdough starter should be active and bubbly before baking. If it doesn’t pass the float test (a small spoonful should float in water), it needs more time to feed.
- Hydration: This dough is on the wetter side, which helps create an airy crumb. If it feels too sticky to handle, lightly flour your hands or use a bench scraper.
- Don’t rush the process: Bulk fermentation and proofing times can vary based on room temperature. If your kitchen is cold, your dough may need longer to rise.
- Score with confidence: A sharp knife or razor blade makes all the difference when scoring. A deep, clean cut helps the bread expand properly in the oven.
- No Dutch oven? No problem!: For the final rise, place the dough in a proofing basket (banneton) lined with a kitchen towel or a piece of parchment paper. Then you can bake sourdough on a preheated baking stone or baking sheet. To trap steam, place a metal pan or glass dish of hot water in the oven or invert a large heatproof bowl over the dough for the first 20 minutes of baking. Then, remove the bowl and continue baking until golden brown.
- Let it cool: Slicing into warm bread is tempting, but waiting at least 30 minutes allows the crumb to set properly.

How to Store Leftover Sourdough Bread
Sourdough bread stays fresh longer than regular bread thanks to its natural fermentation. Store it at room temperature in a paper bag or wrapped in a kitchen towel for up to 3 days. In the refrigerator, it’ll keep for up to a week in an airtight container.
For longer storage, slice and freeze the loaf of sourdough bread in an airtight bag. Just pop a slice in the toaster or microwave when you’re ready to enjoy it again.
What to Serve With Sourdough Bread
This loaf is perfect for everything from simple toast to simple sandwich bread. Try it with a slather of butter and jam, dipped into a warm bowl of French onion soup, or as the base for an epic grilled cheese.
The chewy texture and tangy flavor make it a great match for both sweet and savory toppings.

More Recipes You Will Love
I love experimenting with different bread recipes, and if you do too, here are some more to try:
- Sourdough Bagels
- Overnight Sourdough Cinnamon Rolls Recipe
- Cinnamon Swirl Bread Recipe
- Avocado Banana Bread Recipe
- Chocolate Chip Banana Bread

Ingredients
- 3 ½ cups bread flour
- 1 ¼ cups water
- 3 ½ ounces sourdough starter
- 1 tablespoon salt
Instructions
- Combine the bread flour, water, and sourdough starter in a stand mixer or a mixing bowl. Stir thoroughly until all ingredients are fully incorporated. Allow the mixture to rest for one hour to begin proofing naturally—this process is known as autolyse.3 ½ cups bread flour, 1 ¼ cups water, 3 ½ ounces sourdough starter
- After the resting period, add the salt and mix the dough for 10 minutes. The consistency will be very sticky.1 tablespoon salt
- Once mixed, remove the dough from the bowl and lightly grease the same bowl. Return the dough to the bowl, cover it with plastic wrap, and let it proof for at least 2 hours, or until it has doubled in size.
- Gently deflate the dough and shape it into a large ball. Since the dough is very sticky, wetting your hands can make handling easier.
- Grease a Dutch oven (preferably 9 inches in size, though a larger one can be used) and place the dough inside. Let it proof for another 2 hours.
- Preheat the oven to 400ºF (200ºC). Score the top of the dough, cover the Dutch oven with its lid, and bake for 45 minutes. Then, remove the lid and continue baking for another 15 minutes, or until the top is golden brown.
- Allow the bread to cool before slicing. Serve and enjoy!
Video
Notes
- Flour: You can use all-purpose flour instead of bread flour, but the texture will be slightly different. Bread flour has more protein, which helps create a chewier crumb. If using all-purpose flour, reduce the water slightly to adjust for the lower gluten content.
- Use a strong starter: Your sourdough starter should be active and bubbly before baking. If it doesn’t pass the float test (a small spoonful should float in water), it needs more time to feed.
- Hydration: This dough is on the wetter side, which helps create an airy crumb. If it feels too sticky to handle, lightly flour your hands or use a bench scraper.
- Don’t rush the process: Bulk fermentation and proofing times can vary based on room temperature. If your kitchen is cold, your dough may need longer to rise.
- Score with confidence: A sharp knife or razor blade makes all the difference when scoring. A deep, clean cut helps the bread expand properly in the oven.
- No Dutch oven? No problem!: For the final rise, place the dough in a proofing basket (banneton) lined with a kitchen towel or a piece of parchment paper. Then you can bake sourdough on a preheated baking stone or baking sheet. To trap steam, place a metal pan or glass dish of hot water in the oven or invert a large heatproof bowl over the dough for the first 20 minutes of baking. Then, remove the bowl and continue baking until golden brown.
- Let it cool: Slicing into warm bread is tempting, but waiting at least 30 minutes allows the crumb to set properly.
Storage and Reheating Instructions
- Room Temperature: Store it at room temperature in a paper bag or wrapped in a kitchen towel for up to 3 days.
- Fridge: In the refrigerator, it’ll keep for up to a week in an airtight container.
- Freeze: For longer storage, slice and freeze the loaf of sourdough bread in an airtight bag. Just pop a slice in the toaster or microwave when you’re ready to enjoy it again.
Nutrition
About the Author

Hey there! I’m Mandy
Mandy Applegate is a home cook, food blogger, and writer who believes the best meals are the ones shared with the people you love.
She’s all about easy recipes that taste amazing, the kind that make ordinary days feel a little more special and remind you why cooking at home matters.
She has been published on NBC, the Daily News, the Boston Herald, and the Chicago Sun-Times, amongst many others.