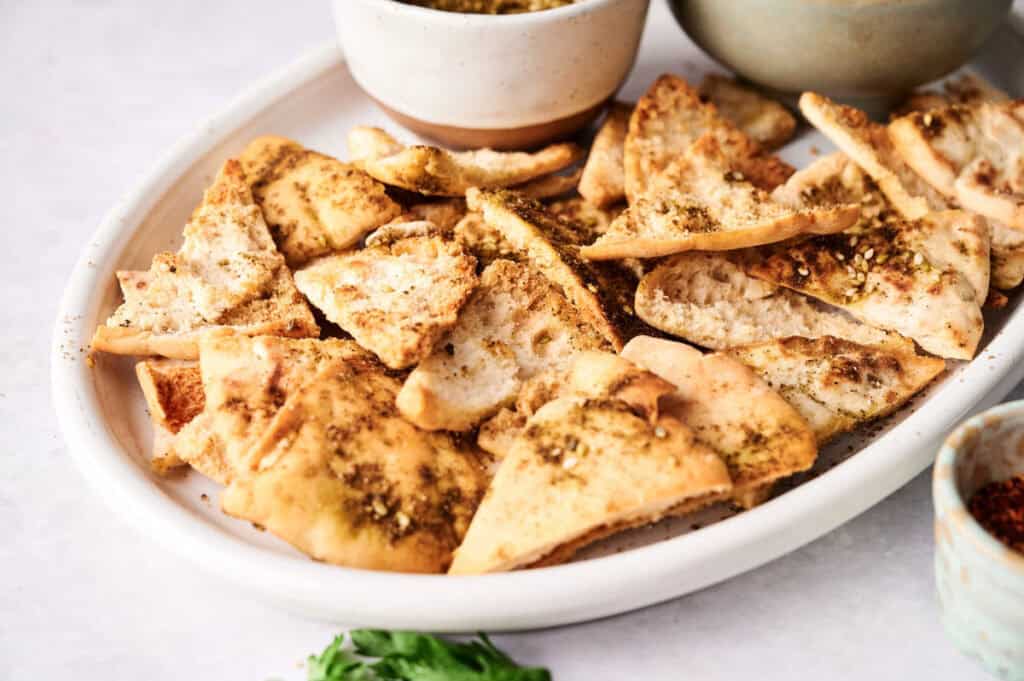
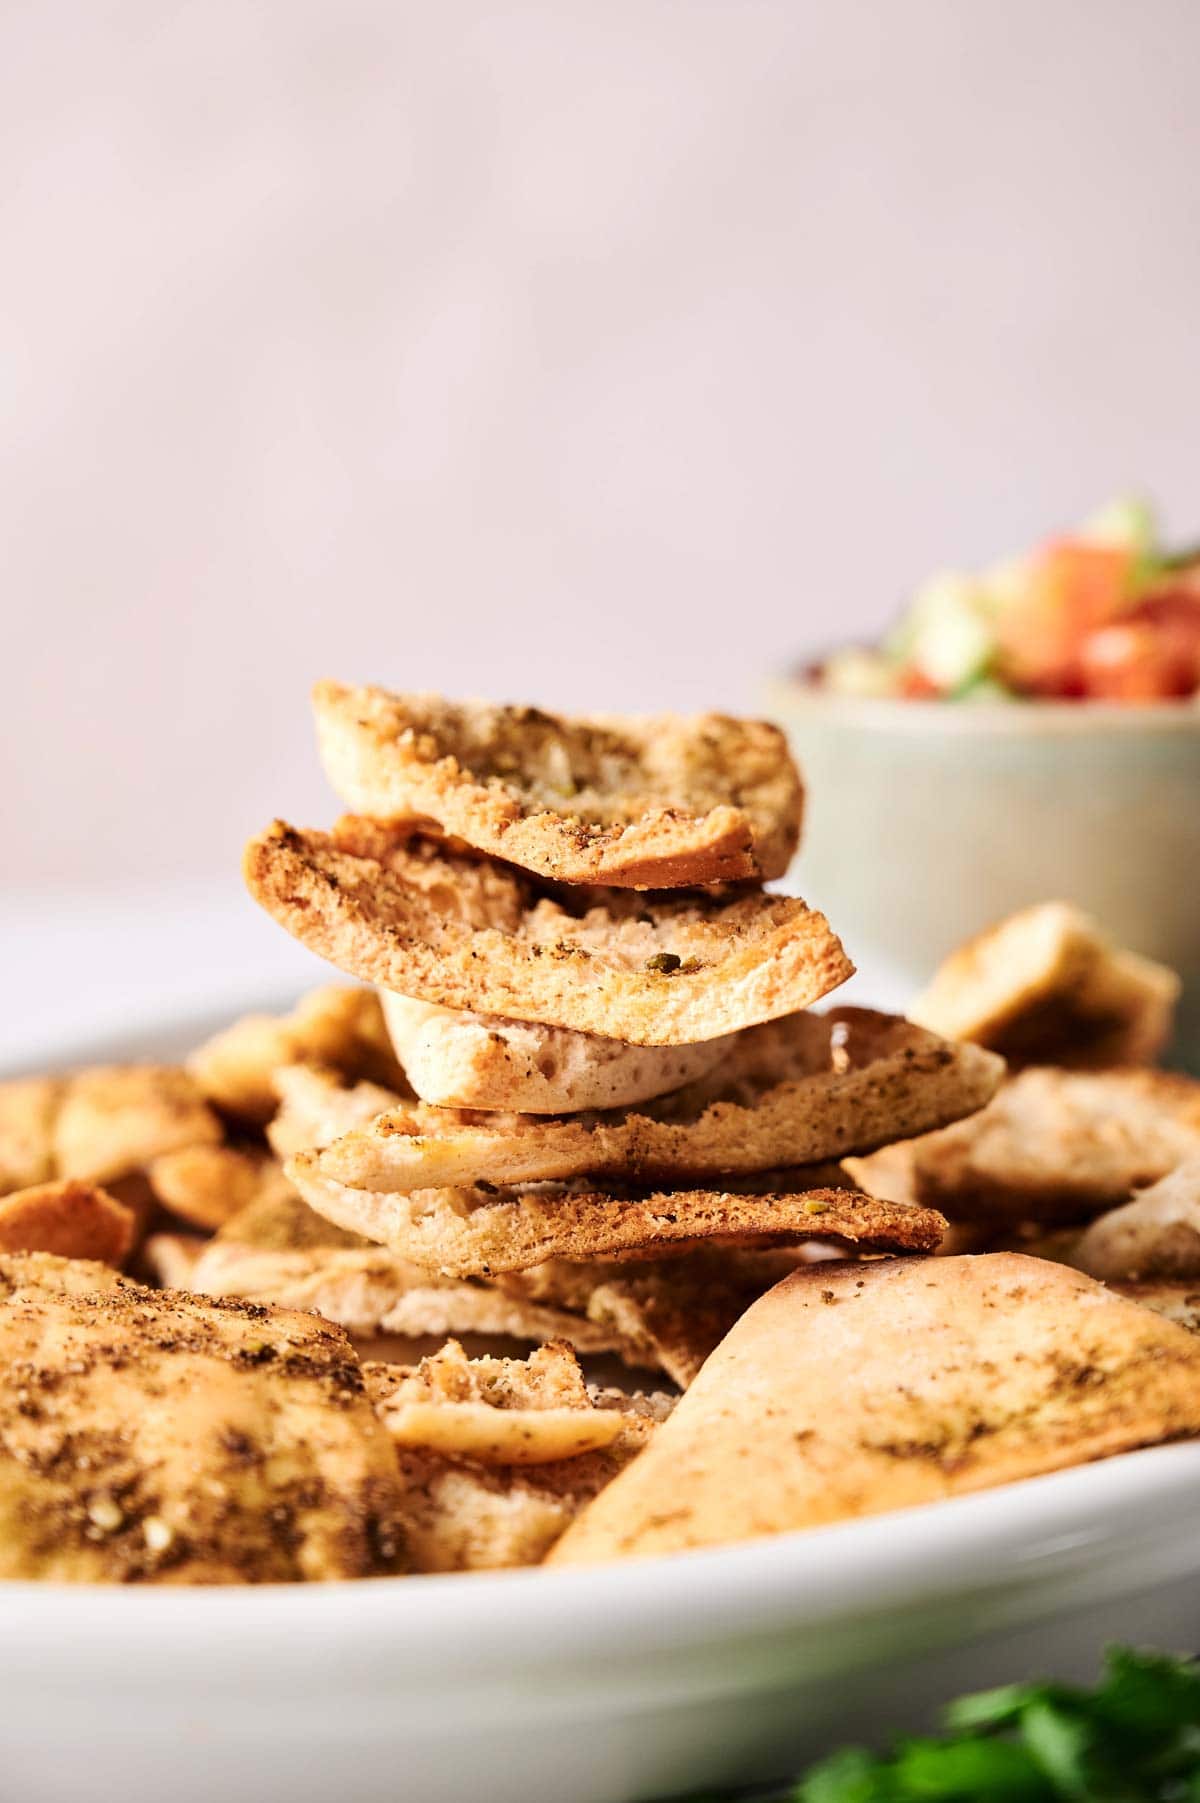
Pita Chips

Homemade Pita Chips are one of those things that seem too easy to be this good. They get perfectly crispy with golden edges that crunch, and the za’atar adds herby, tangy flavor that makes them taste bakery-fresh. They’re light, sturdy enough for any dip, and so much fresher than anything in the snack aisle.
This post contains affiliate links. As an Amazon Affiliate, if you purchase through those links, I earn a commission. Thank you!
I make them for game day parties, potlucks, picnics, and holiday appetizer spreads whenever I want a healthier alternative to regular chips that pairs perfectly with any hummus or dips. They’re budget-friendly, travel well without breaking, and stay crispy for days at room temp. Store them in an airtight container for up to a week or freeze for 2 to 3 months.
Ingredients You’ll Need
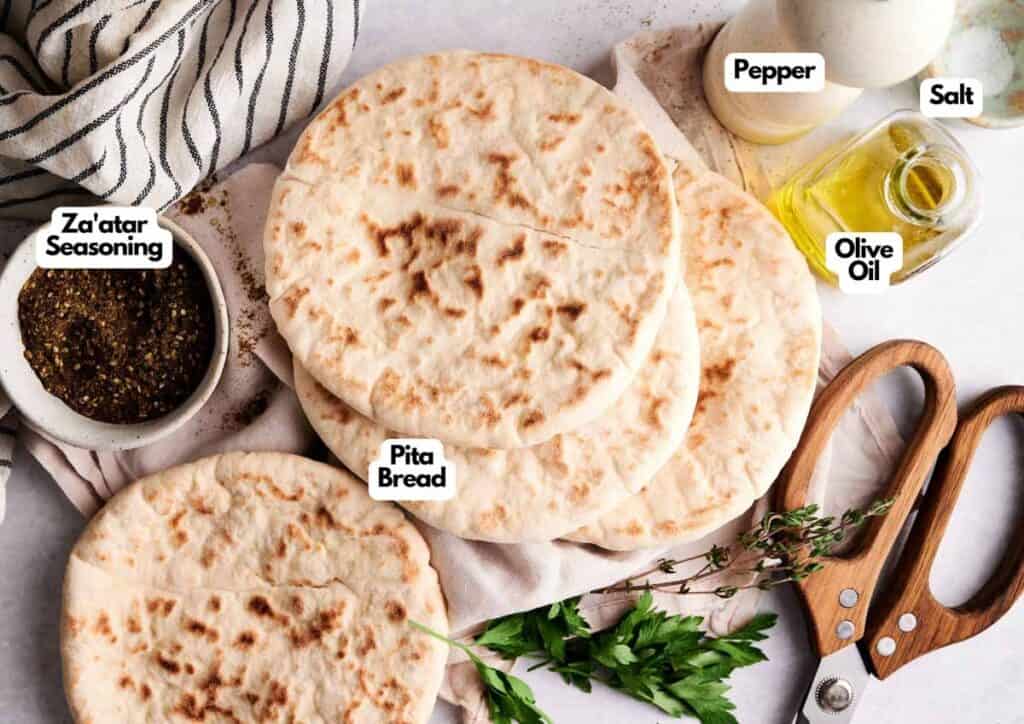
You’ll need all the ingredients shown in the photograph below.
How to Make Pita Chips with Step-By-Step Instructions
Scroll down for the full recipe card containing a full printable recipe and measurements in both US customary and metric units.
These pita chips come together incredibly fast, and you’ll love how crispy they turn out.
Preheat the Oven and Prep the Baking Sheet
Preheat your oven to 425°F (220°C) and line a large rimmed baking sheet with nonstick parchment paper to prevent sticking. The high heat creates crispy edges while keeping the chips light and crunchy.
Split the Pita Breads
If you’re using pita pockets, carefully cut each one in half horizontally at the seam to create two thin rounds. Splitting them creates lighter, crispier chips that bake evenly.
If you’re using thicker, single-layer pita bread, skip this step. You can use either homemade or store-bought chips; just note that store-bought can be salty, so you may need to use less salt here.
Season the Pita Rounds
Brush both sides of the pita rounds lightly with olive oil using a silicone pastry brush. Sprinkle with salt and za’atar on both sides. The olive oil helps the seasoning stick and creates golden, crispy edges as they bake.
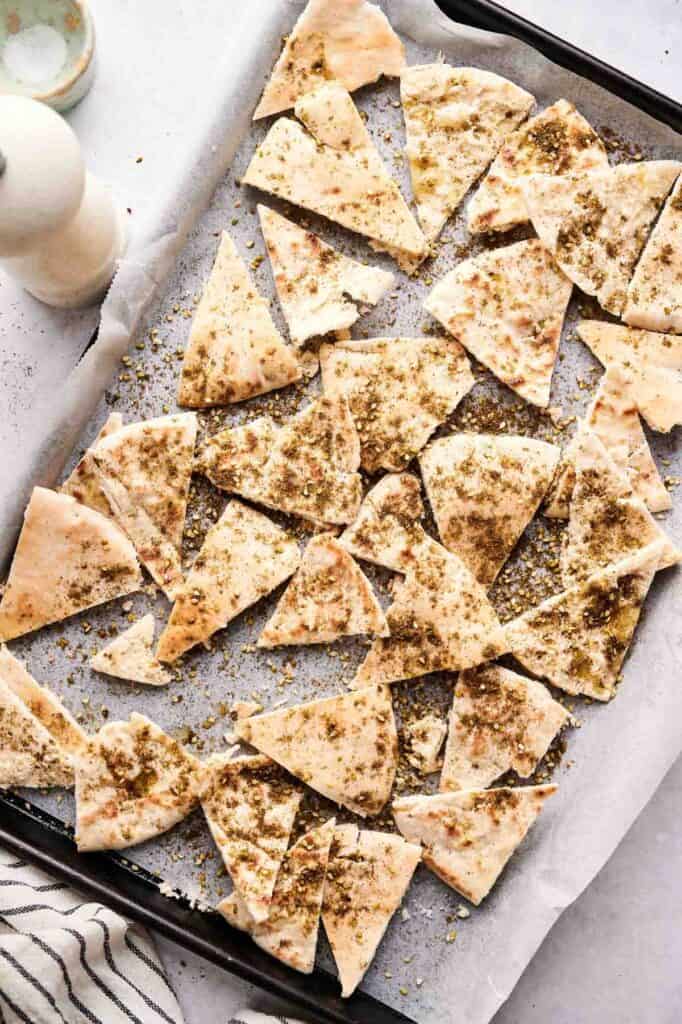
Cut Into Triangles
Cut each round into small equal triangles using a pizza cutter, sharp knife, or kitchen shears. Arrange the triangle pitas in a single layer on the prepared sheet pan. Don’t overlap them or they’ll steam instead of crisping up.
Bake the Pita Chips
Bake for 5–10 minutes, flipping halfway through or rotating any pieces that brown quickly. Watch closely to avoid over-browning. The chips will continue to crisp up as they cool.
Cool and Serve
Let cool slightly before serving. Enjoy with hummus, dips, or on their own!
Pita chips travel incredibly well because they’re sturdy and stay crispy. Let them cool completely before packing to prevent condensation. For picnics or potlucks, pack them in a resealable bag or container with a tight-fitting lid.
They’ll stay crispy for hours at room temperature and won’t get soggy like other chips. If you’re bringing dip separately, pack it in small containers with lids so nothing leaks during transport.
Ingredients
- 2 to 3 pita breads with pockets store-bought or homemade
- Olive oil for brushing
- Salt to taste
- 1 tablespoon za’atar seasoning
Instructions
- Preheat your oven to 425°F (220°C). Line a large baking sheet with parchment paper.
- If using pita pockets, carefully cut each one in half horizontally at the seam to create two thin rounds. If using thicker, single-layer pita, skip this step.2 to 3 pita breads with pockets
- Brush both sides of the pita rounds lightly with olive oil. Sprinkle with salt and za’atar on both sides.Olive oil, Salt, 1 tablespoon za’atar seasoning
- Cut each round into small equal triangles using a sharp knife or kitchen shears. Arrange the pita triangles in a single layer on the prepared sheet pan.
- Bake for 5–10 minutes, flipping halfway through or rotating any pieces that brown quickly. Watch closely to avoid over-browning.
- Let cool slightly before serving. Enjoy with hummus, dips, or on their own!
Video
Notes
Nutrition
How to Store Leftovers
Let the pita chips cool completely before storing them. Keep them in an airtight container at room temp for up to a week. They’ll stay crispy as long as the container seals tightly and no moisture gets in.
For longer storage, freeze them in a freezer-safe container or resealable freezer bag for 2 to 3 months. Let them thaw at room temp for 10 minutes before serving. You can pop them in the oven to help them crisp back up.
What to Serve With Pita Chips
These chips are perfect with roasted red pepper hummus, baba ghanoush, tzatziki, or any Mediterranean dip you love. I also serve them with spinach artichoke dip, salsa, guacamole, or even cheese dip for parties.
You can also crumble them over salads for added crunch, use them as a base for nachos, or serve them alongside stews or tomato soups with basil, oregano, or a blend of herbs.
More Easy Recipes for You to Try at Home
You’ll love these other easy appetizers perfect for parties, potlucks, and picnics.
- Sausage Balls
- Brats in a Blanket
- Loaded Baked Potato Bites
- Ham and Cheese Crescent Rolls
- Roasted Pepper Pinwheel Sandwiches
About the Author

Hey there! I’m Mandy
Mandy Applegate is a home cook, food blogger, and writer who believes the best meals are the ones shared with the people you love.
She’s all about easy recipes that taste amazing, the kind that make ordinary days feel a little more special and remind you why cooking at home matters.
She has been published on NBC, the Daily News, the Boston Herald, and the Chicago Sun-Times, amongst many others.