Chocolate Peanut Butter Rice Krispies
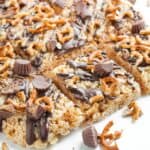
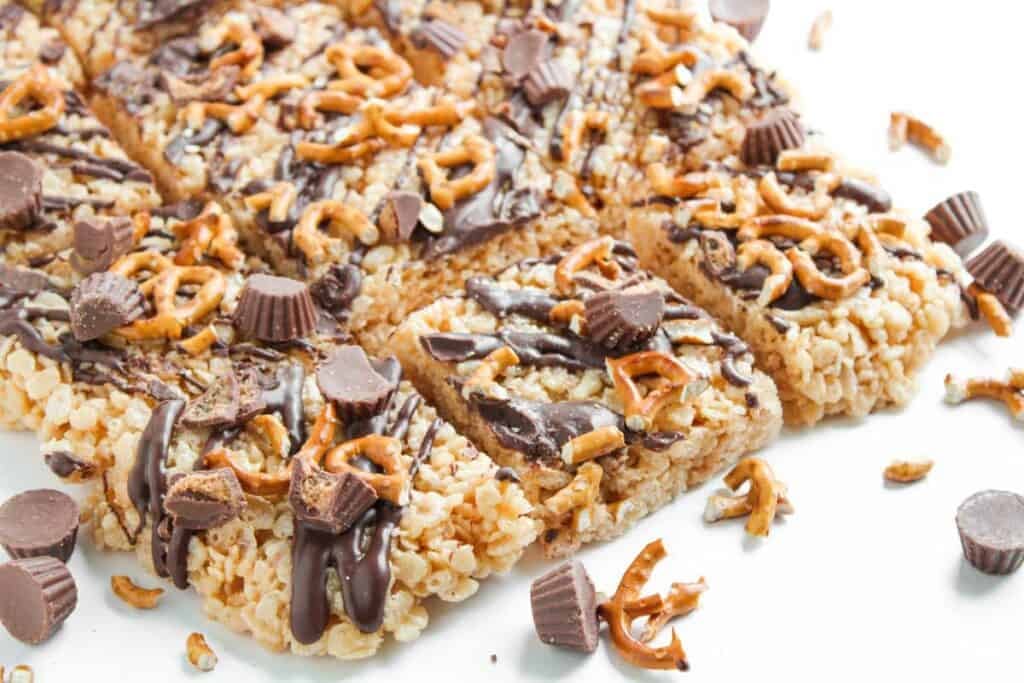
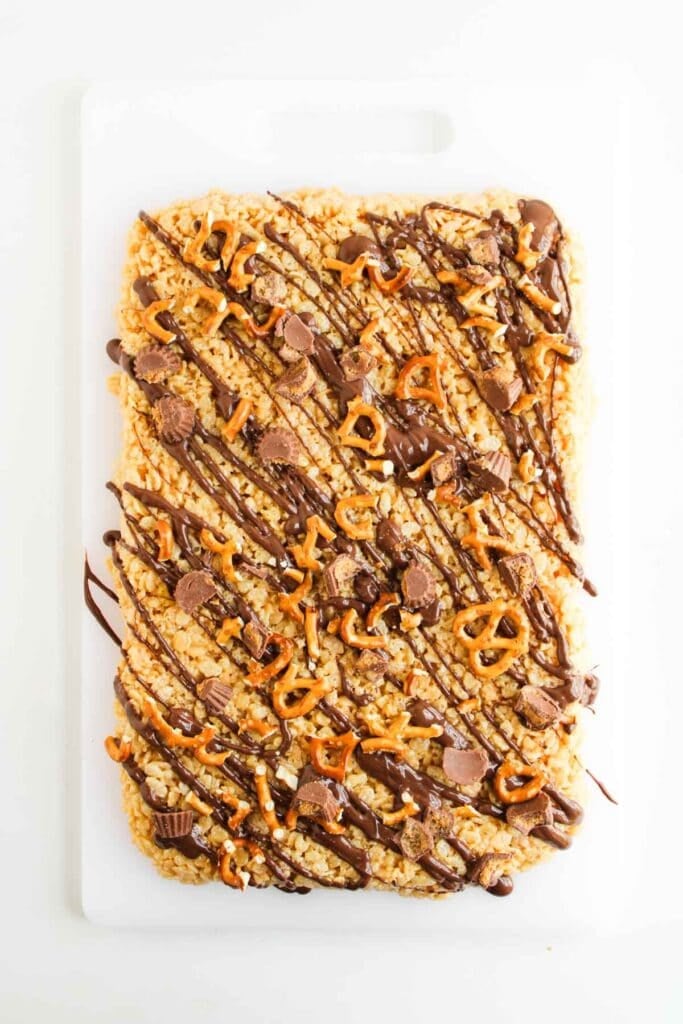
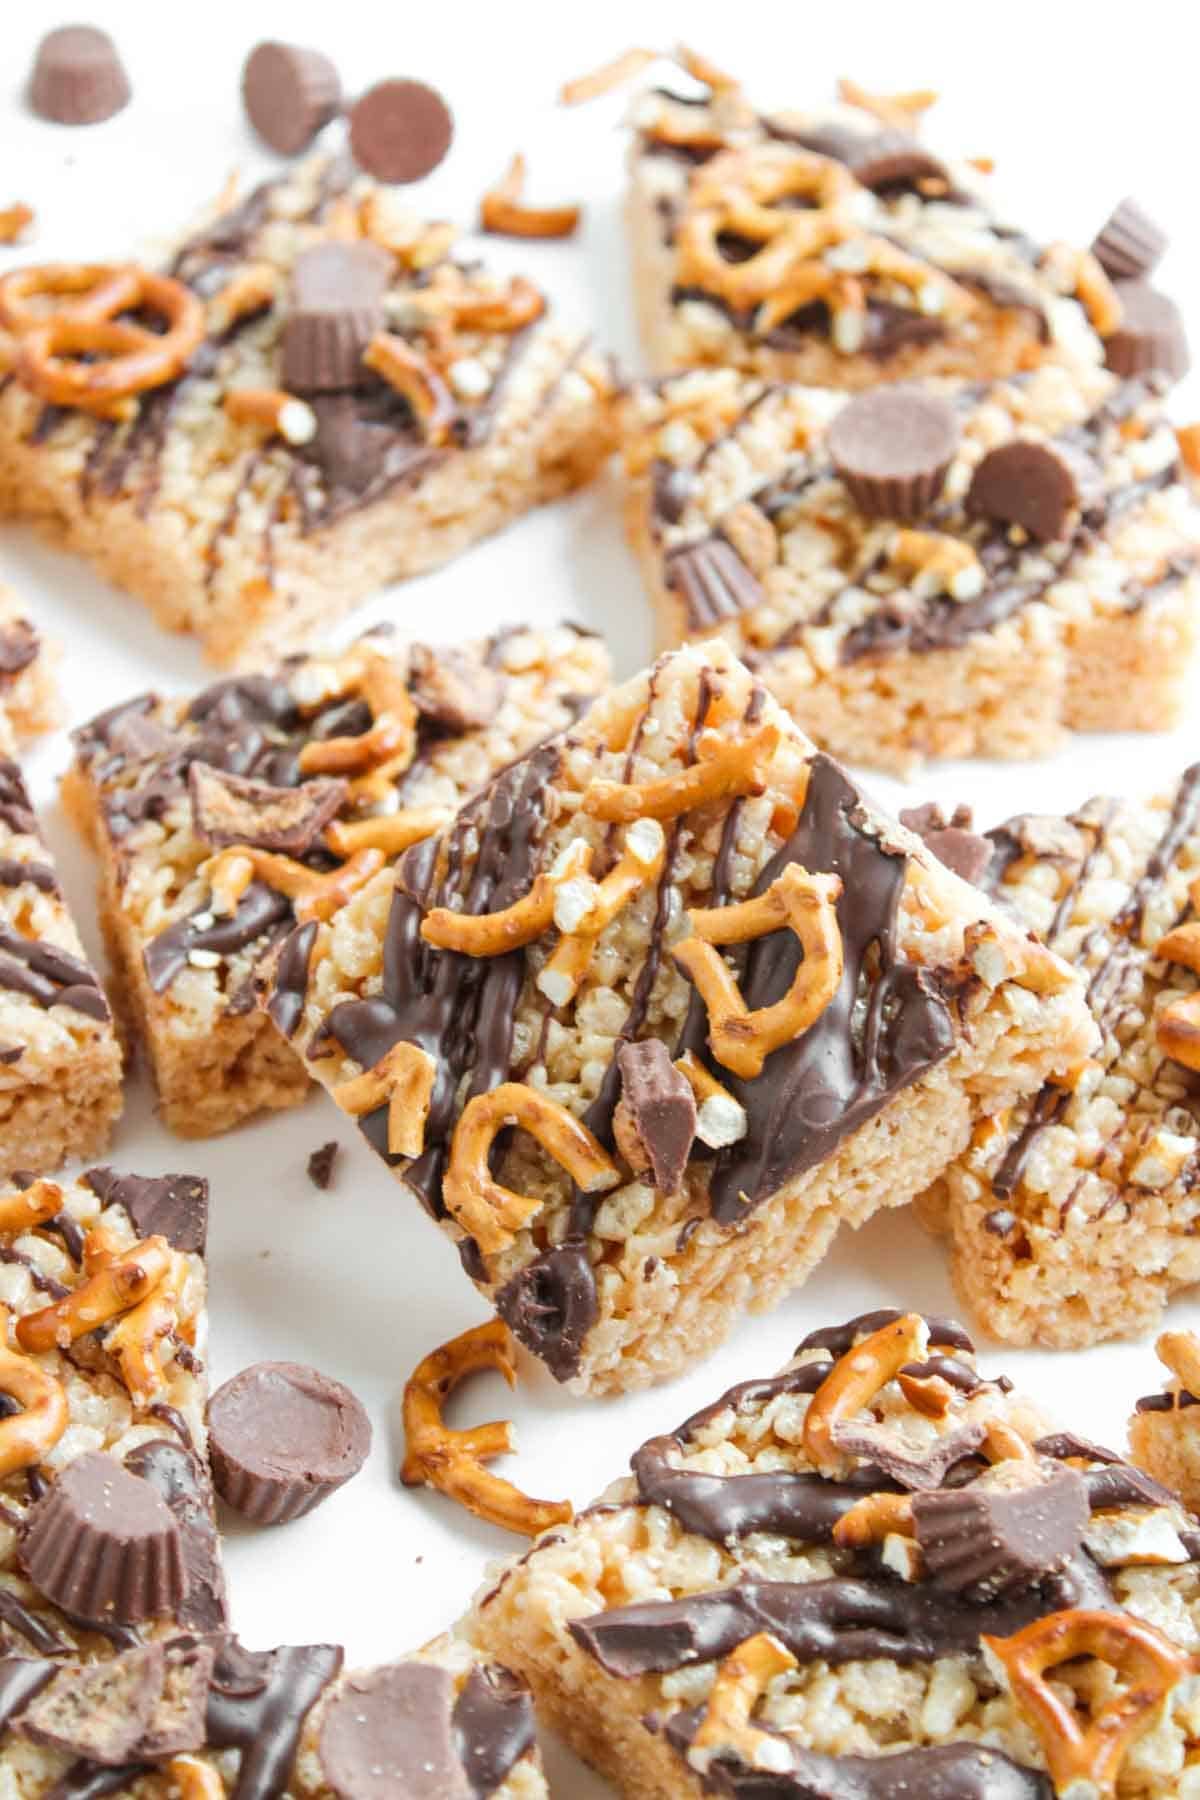
I throw together these Chocolate Peanut Butter Rice Krispies when I’m craving that perfect salty-sweet combo. You get crispy cereal coated in marshmallow and peanut butter, then drizzled with melted chocolate and topped with salty pretzels and mini Reese’s. Each square is chewy and crunchy, and you won’t be able to stop at just one.
This post contains affiliate links. As an Amazon Affiliate, if you purchase through those links, I earn a commission. Thank you!
I make them for bake sales, birthday parties, and holiday dessert platters at Halloween and Christmas because they’re quick, no-bake, and budget-friendly. Perfect for school snacks, lunchboxes, or gifting since they’re kid-friendly and travel well. The treats stay fresh at room temperature for 2 to 3 days or freeze for up to 2 months for easy make-ahead prep.
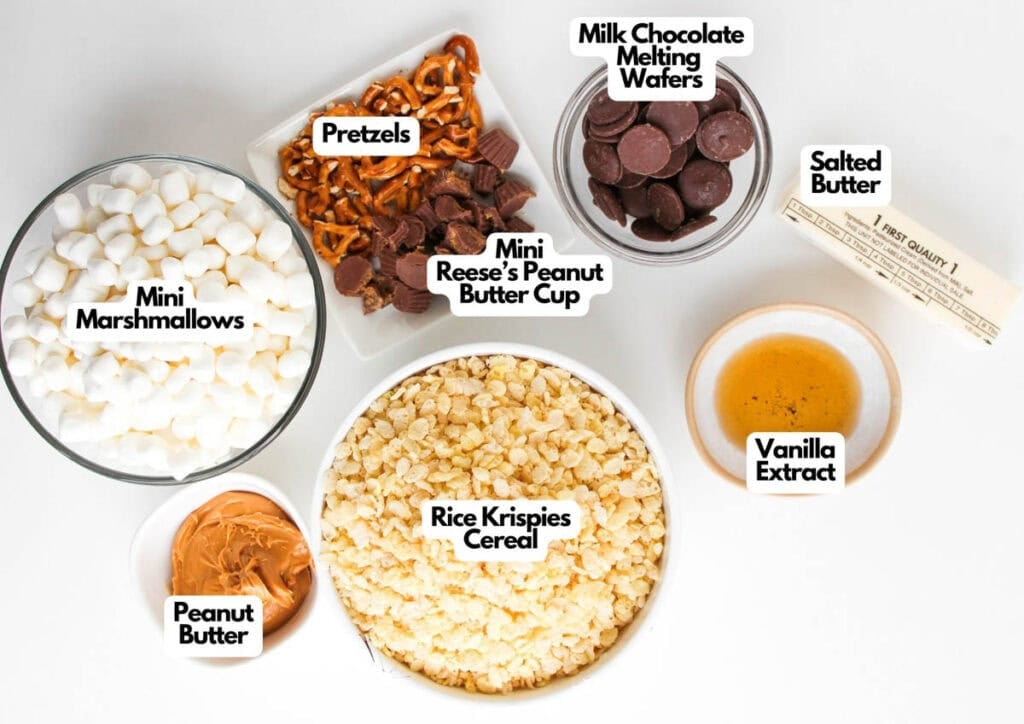
Ingredients You’ll Need
You’ll need all the ingredients shown in the photograph below.
How to Make Chocolate Peanut Butter Rice Krispies with Step-By-Step Instructions
Scroll down for the full recipe card containing a full printable recipe and measurements in both US customary and metric units.
You’ll have these Chocolate Peanut Butter Rice Krispie treats assembled and ready to set in about 15 minutes of active work.
Prep Your Pan
Line a 9×13-inch baking dish with parchment paper or foil, letting some hang over the sides so you can lift the treats out easily later, and give it a light mist of nonstick cooking spray.
I use this nonstick baking pan because it gives me an even base, prevents sticking, and makes lifting the bars out effortless, especially once I line it with parchment and give it a quick mist of spray.
Melt the Butter and Peanut Butter
Put the butter in a large pot over medium heat and let it melt completely. Stir in the peanut butter (or natural peanut butter, if you like a more subtle sweetness) and vanilla until everything’s smooth to create the peanut butter mixture. The peanut butter will loosen up as it warms, so don’t worry if it looks thick at first.
I always reach for my heavy-bottomed pot here because it melts the butter evenly, keeps the peanut butter from scorching, and helps everything come together smooth and creamy every time.
Add the Marshmallows
Dump in the mini marshmallows and stir constantly until they’re completely melted and you’ve got a smooth, glossy mixture, which usually takes about 3 to 4 minutes. I love using my sturdy silicone spatula here because it can handle the heat, scrape the bottom of the pot easily, and make this constant stirring so much easier.
Pull the pot off the heat as soon as the marshmallows are melted so the mixture doesn’t get too stiff.
SERIOUSLY GOOD
DESSERTS!
Dessert First is a collection of 61 RECIPES to show you that you can make beautiful, impressive desserts right in your own kitchen, no matter your skill level.
Immediate eBook download. No physical book available.
Includes ad-free recipes like:
∙ Lemon Pound Cake
∙ Starbucks Cake Pops
∙ Boston Cream Pie
∙ Chocolate Mousse
∙ Matcha Tiramisu
...and much more!

Mix in the Cereal
Add the Rice Krispies to the pot and stir until the cereal mixture is evenly coated with the marshmallow mixture, working quickly because it starts to firm up as it cools.
Press Into the Pan
Scrape the mixture into your prepared pan and press it down evenly, using a greased spatula or lightly greased hands to smooth the top so it’s flat and even.
Don’t press too hard, or the treats will be dense instead of light and crispy. Let them cool at room temperature for about 20 minutes until they’re set enough to handle.
Add the Toppings
Lift the treats out of the pan using the parchment paper overhang and put them on a cutting board. Melt the chocolate chips (or add butterscotch chips for extra sweetness) in the microwave in 30-second bursts, stirring between each one until they’re smooth and melted without burning.
You can use a spoon in here, but I prefer using my squeeze bottle because it lets me control the drizzle perfectly and create clean zigzag lines without any mess.
While the chocolate’s still wet, sprinkle on the halved mini Reese’s and crushed pretzels. Let the chocolate harden completely before slicing, which takes about 30 minutes at room temperature or 10 minutes in the fridge. Serve these treats and enjoy!
Ingredients
- 1 cup salted butter
- 10 ounces mini marshmallows
- ¼ cup creamy peanut butter
- 1 teaspoon vanilla extract
- 6 cups Rice Krispies cereal
- 1 cup mini Reese’s halved
- 1 cup mini pretzels crushed
- ½ cup milk chocolate chips or melting wafers
Instructions
- Line a 9×13-inch baking dish with parchment paper or foil. Lightly spray with nonstick spray and set aside.
- In a large pot over medium heat, melt the butter. Stir in the peanut butter and vanilla until smooth.1 cup salted butter, ¼ cup creamy peanut butter, 1 teaspoon vanilla extract
- Add the marshmallows and stir constantly until melted and fully combined. Remove from heat. Add the Rice Krispies to the pot and stir until evenly coated.10 ounces mini marshmallows, 6 cups Rice Krispies cereal
- Press the mixture evenly into the prepared baking dish. Use a spatula or greased hands to smooth the top. Let it cool for about 20 minutes.
- Once set, lift the treats out of the pan and place them on a cutting board. Melt the chocolate chips in the microwave in 30-second bursts, stirring in between until smooth. Drizzle the melted chocolate over the top. Sprinkle with halved mini Reese’s and crushed pretzels.1 cup mini pretzels, ½ cup milk chocolate chips or melting wafers, 1 cup mini Reese’s
- Allow the chocolate to harden completely, then slice into bars or squares. Enjoy!
Notes
- Use fresh marshmallows: Stale marshmallows won’t melt smoothly and can make your treats hard and dry rather than chewy.
- Don’t overheat the marshmallows: Pull the pot off the heat as soon as the marshmallows are melted so they don’t overcook and turn the mixture stiff and tough to work with.
- Work quickly: The marshmallow mixture firms up as it cools, so mix in the cereal and press it into the pan while everything’s still warm and pliable.
- Grease your hands: Lightly coat your hands with butter or nonstick spray before pressing the mixture into the pan so it doesn’t stick to your fingers.
- Customize the toppings: Swap the Reese’s for chopped peanut butter cups, use white chocolate instead of milk chocolate, or add chopped peanuts for extra crunch.
- Flash freeze before storing: Freeze the bars on a baking sheet for 30 minutes before stacking them in a container so the chocolate doesn’t smudge, and they don’t stick together.
Nutrition
SERIOUSLY GOOD
DESSERTS!
Dessert First is a collection of 61 RECIPES to show you that you can make beautiful, impressive desserts right in your own kitchen, no matter your skill level.
Immediate eBook download. No physical book available.
Includes ad-free recipes like:
∙ Lemon Pound Cake
∙ Starbucks Cake Pops
∙ Boston Cream Pie
∙ Chocolate Mousse
∙ Matcha Tiramisu
...and much more!
How to Store Leftovers
Keep them in an airtight container with locking lids at room temperature for up to 2–3 days. Stack them between layers of parchment paper so the chocolate doesn’t stick, and know that they’ll stay crispy and chewy for the first few days, though they may soften slightly after that.
For longer storage, freeze them in a single layer on a baking sheet until solid, then transfer to a freezer-safe glass container or bag for up to 2 months. Thaw at room temperature for about 20 minutes before serving; the chocolate might look a little cloudy after freezing, but the taste and texture stay great.
What to Serve With Chocolate Peanut Butter Rice Krispies
These are perfect for kids’ birthday parties alongside popcorn, fruit skewers, and juice boxes where the sweet-salty combo appeals to all ages. I also love setting them out with chips, pretzels, and candy for movie nights or casual game day spreads.
For potlucks and bake sales, pair them with other easy finger foods like cookies, brownies, or cupcakes so everyone has variety. Cold milk or lemonade works great for kids, while adults appreciate coffee or iced tea to balance the sweetness. The handheld nature makes them ideal for any casual gathering where people want easy snacks.
More Easy Recipes for You to Try at Home
If you’re into no-bake desserts, then you’re going to love these treats, perfect for parties and holiday gatherings.
About the Author

Hey there! I’m Mandy
Mandy Applegate is a home cook, food blogger, and writer who believes the best meals are the ones shared with the people you love.
She’s all about easy recipes that taste amazing, the kind that make ordinary days feel a little more special and remind you why cooking at home matters.
She has been published on NBC, the Daily News, the Boston Herald, and the Chicago Sun-Times, amongst many others.