Homemade Chocolate Ice Cream
This chocolate ice cream recipe is rich, creamy, and full of deep chocolate flavor. It’s made with just a handful of ingredients and doesn’t require eggs or custard. Perfect for an easy summer treat or a late-night freezer raid.
This post contains affiliate links. As an Amazon Affiliate, if you purchase through those links, I earn a small commission. Thank you!
I love this homemade ice cream recipe because creamy texture is smooth and scoopable, and the flavor reminds me of those classic milk chocolate ice creams I used to get at the beach as a kid, only better. It’s quick to throw together, especially since there’s no cooking involved. When I’m craving something cold, chocolatey, and satisfying, this recipe gets the job done with ease.
Ingredients You’ll Need
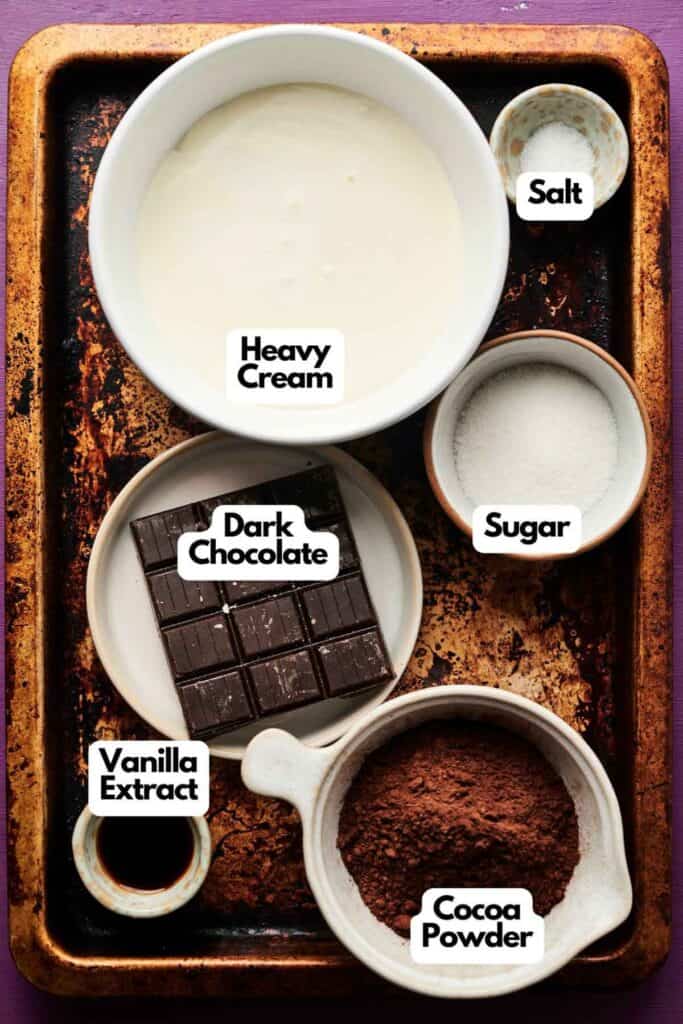
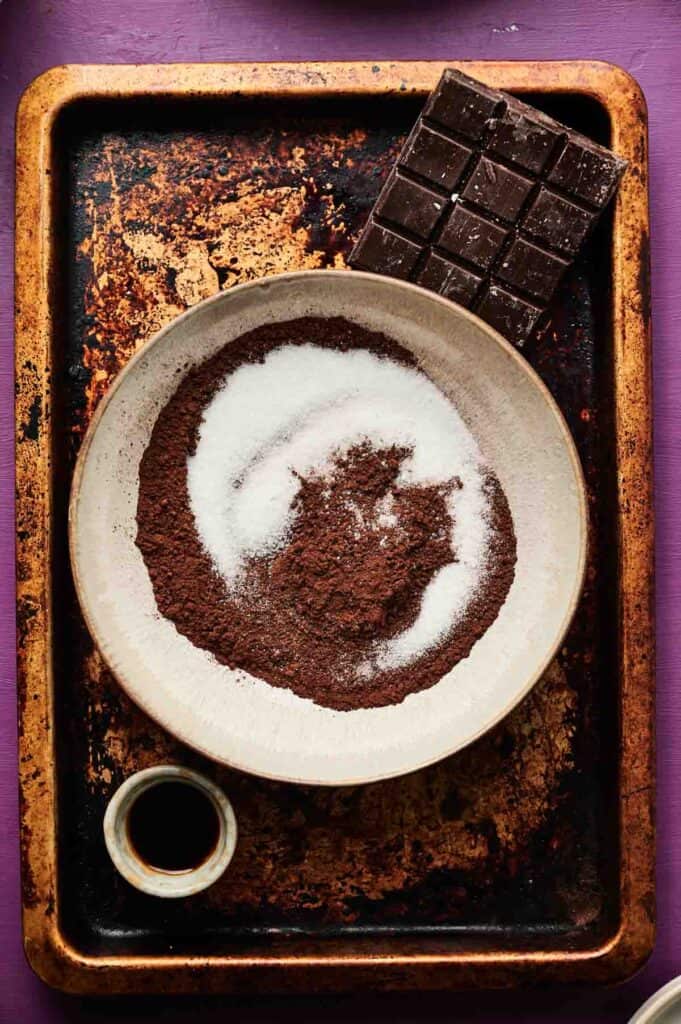
You’ll need all the ingredients shown in the photograph below.
How to Make Chocolate Ice Cream
Scroll down for the full recipe card containing a full printable recipe and measurements in both US customary and metric units.
I like that this chocolate ice cream comes together with minimal effort but still tastes like something you’d get at an old-school creamery. Here’s how I make it at home:
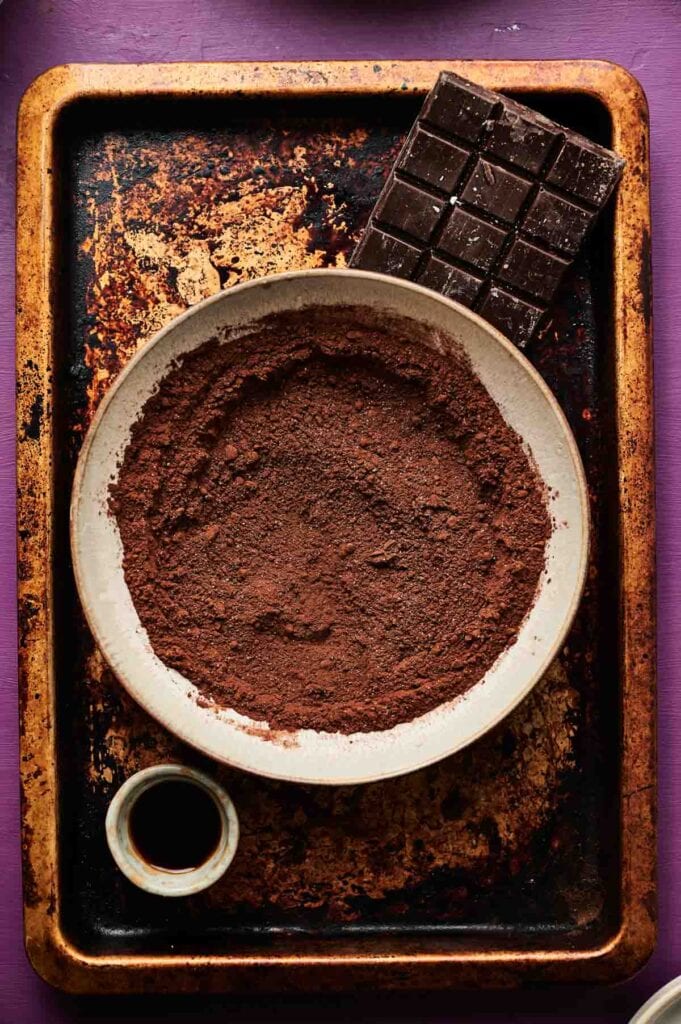
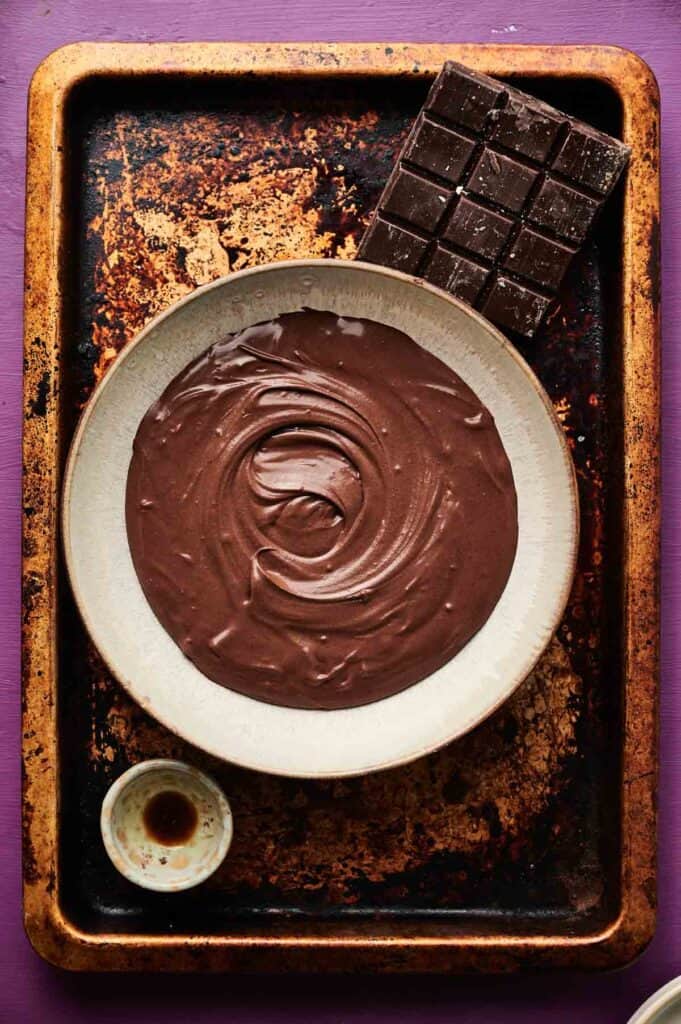
Mix the dry ingredients
In a medium bowl, whisk the sifted cocoa powder, granulated sugar, and a pinch of salt. Make sure everything is well combined. I use a fine mesh strainer to sift the cocoa powder—makes a big difference getting rid of clumps and takes two seconds.
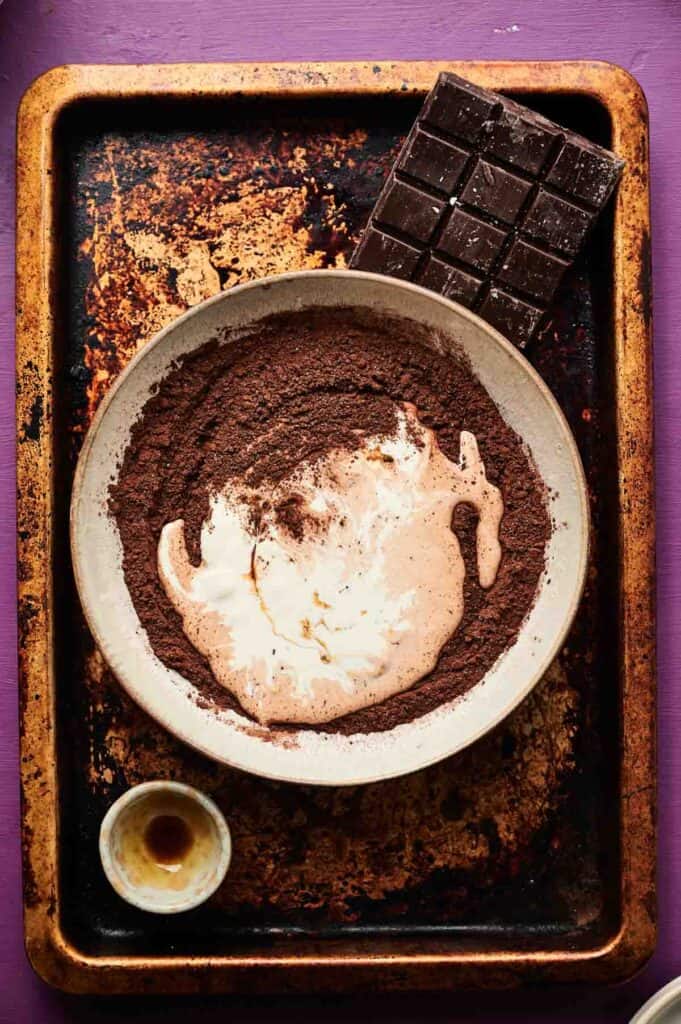
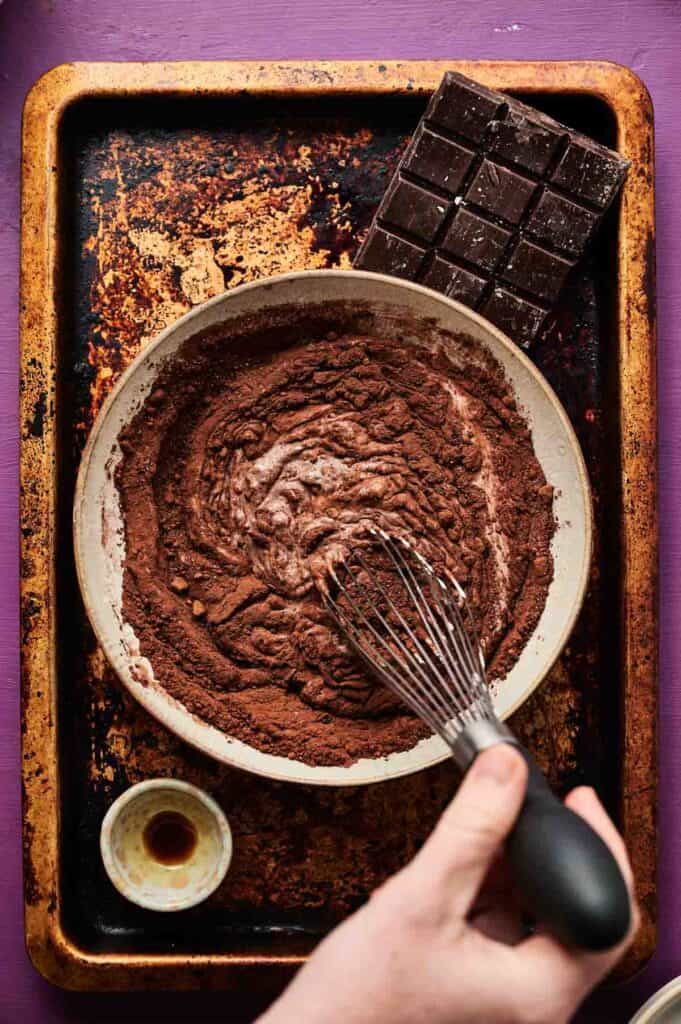
Add the liquids
Stir in the heavy cream and vanilla extract. I switch to a silicone whisk here so it doesn’t scratch the bowl and rinses off fast after. Keep stirring until the mixture is smooth, thick, and completely blended.
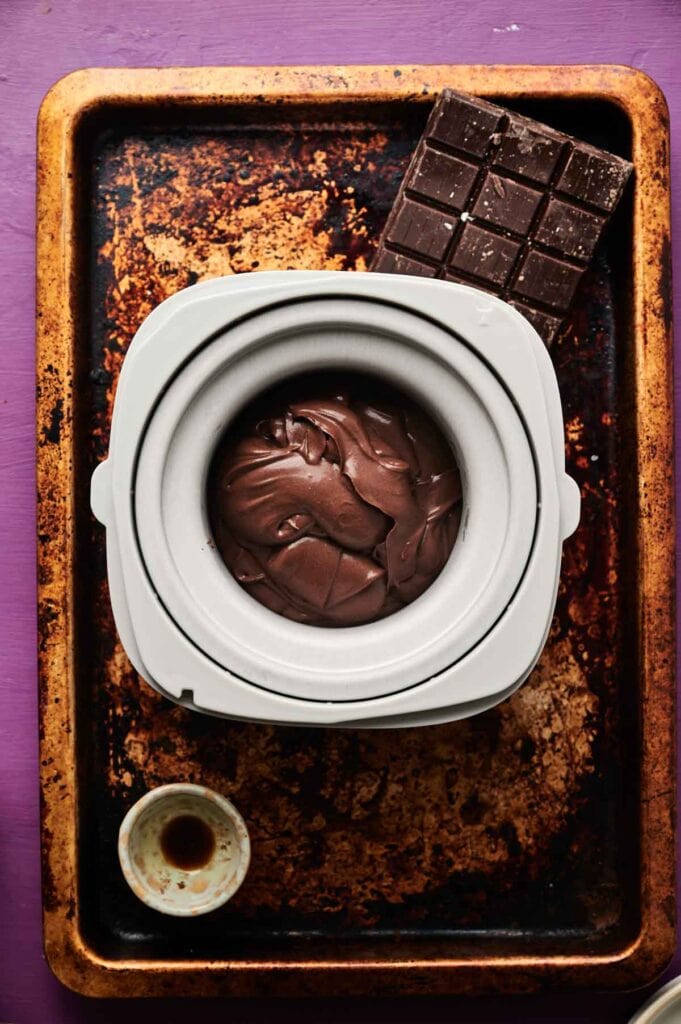
Set up your ice cream maker
Turn on your ice cream maker first so it’s ready. I’ve been using this Ice Cream Maker for years—it’s compact, reliable, and doesn’t take up a ton of space. Then pour the chocolate ice cream mixture into the machine.
SERIOUSLY GOOD
DESSERTS!
Dessert First is a collection of 61 RECIPES to show you that you can make beautiful, impressive desserts right in your own kitchen, no matter your skill level.
Immediate eBook download. No physical book available.
Includes ad-free recipes like:
∙ Lemon Pound Cake
∙ Starbucks Cake Pops
∙ Boston Cream Pie
∙ Chocolate Mousse
∙ Matcha Tiramisu
...and much more!

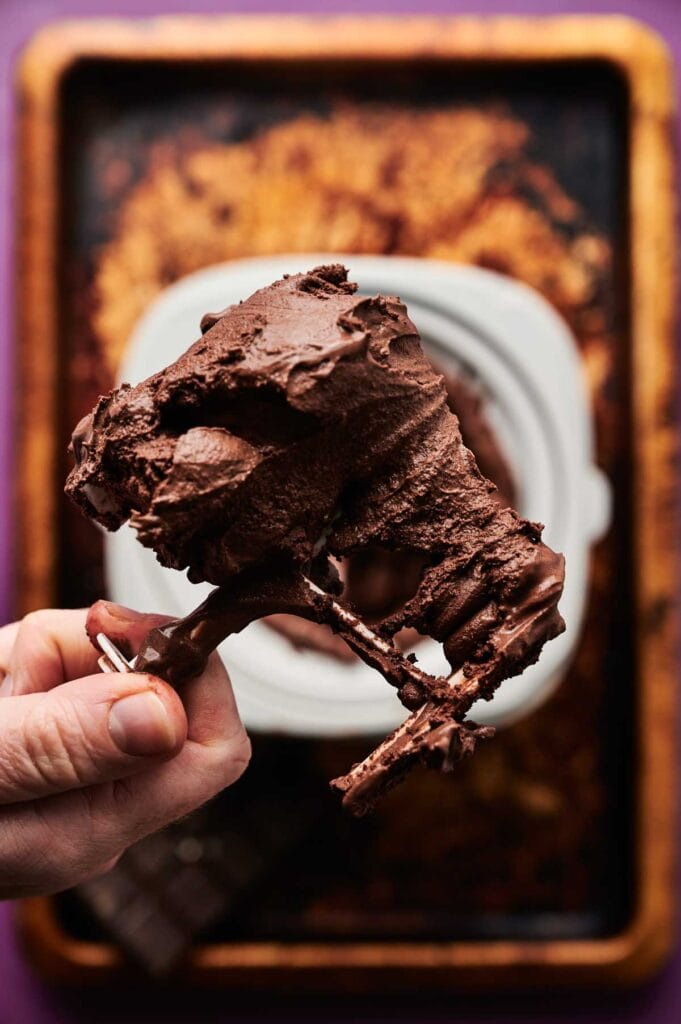
Churn until creamy
Churn according to the manufacturer’s instructions (which was about 15–20 minutes for me), or until the mixture looks like soft-serve ice cream. It should be thick and creamy but still a bit soft.
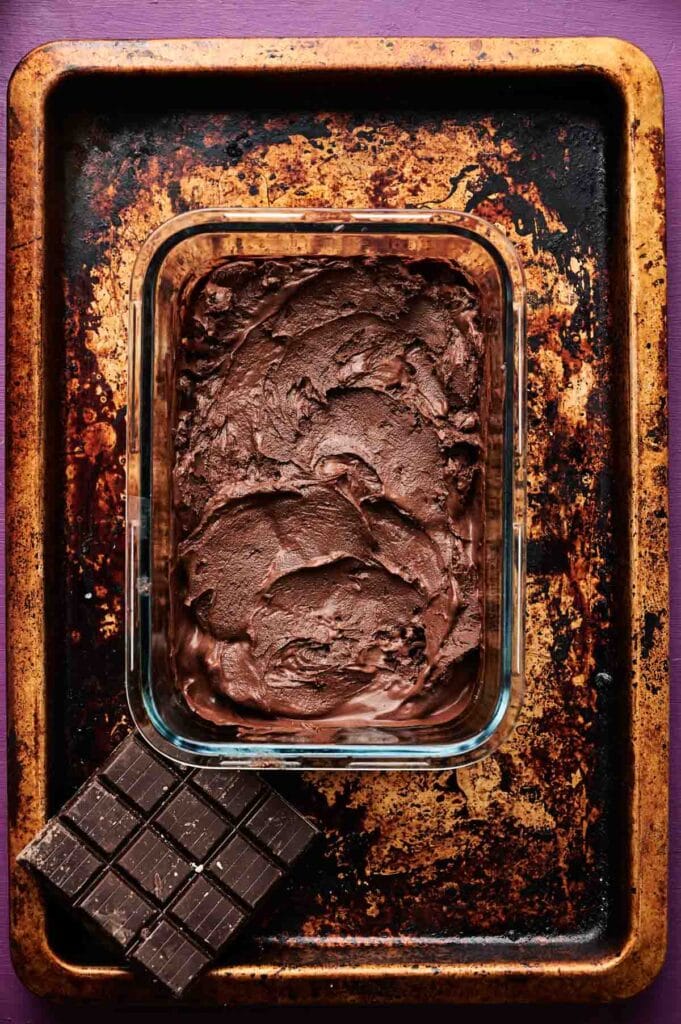
Freeze to set
Scoop the churned ice cream into an airtight container. These freezer-safe quart containers work well because they’re stackable and seal tightly—no weird freezer odors creeping in.
Cover with the lid or plastic wrap, then freeze for at least 4 hours or until firm enough to scoop.
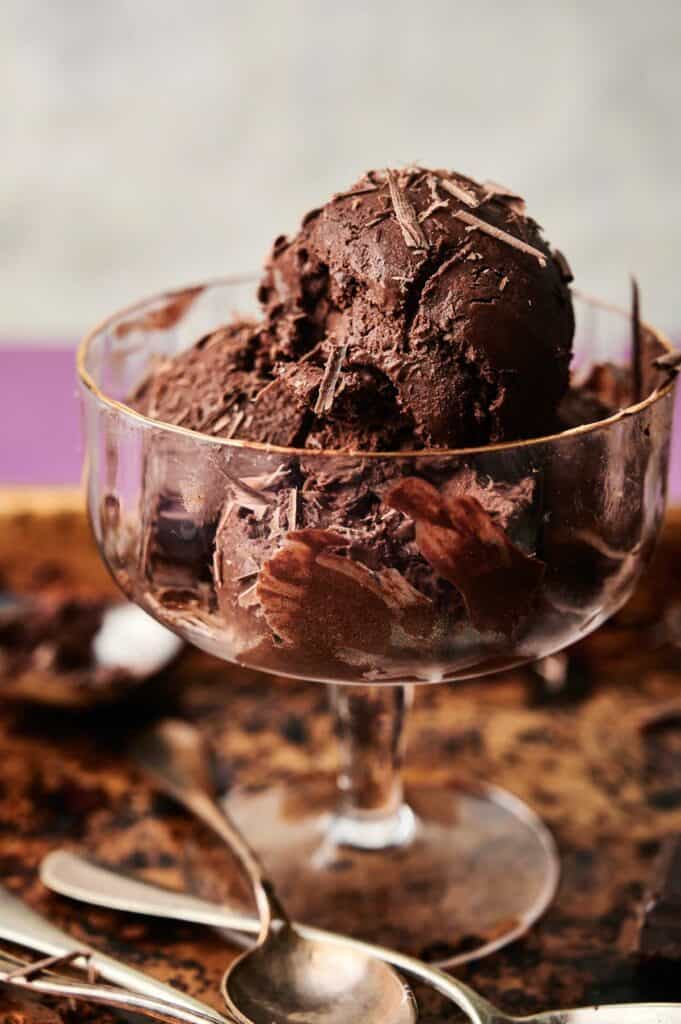
Serve and enjoy
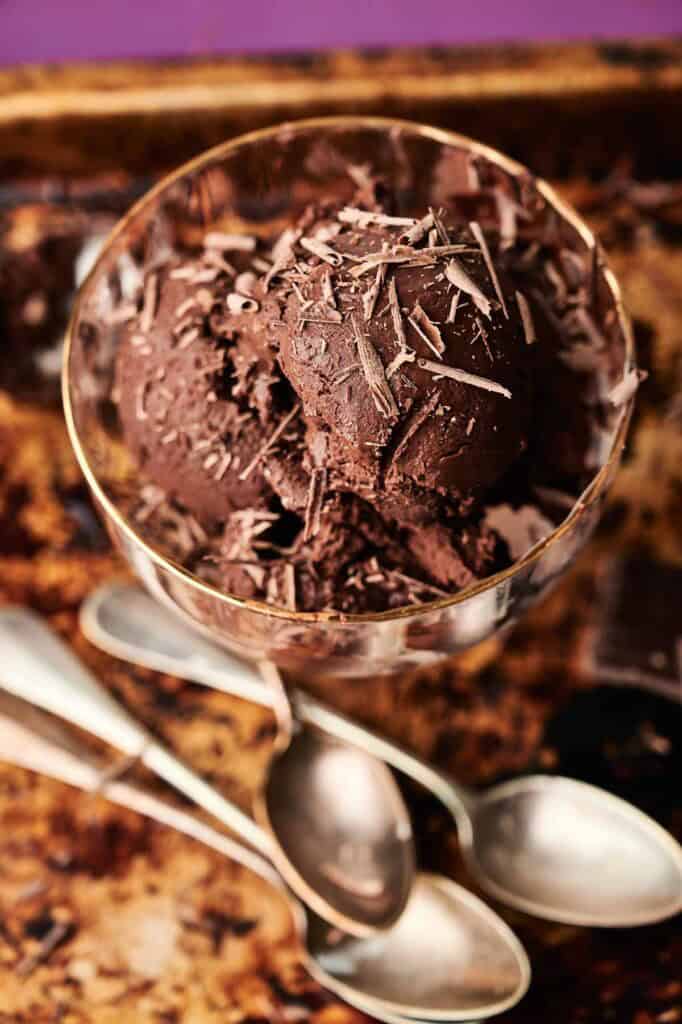
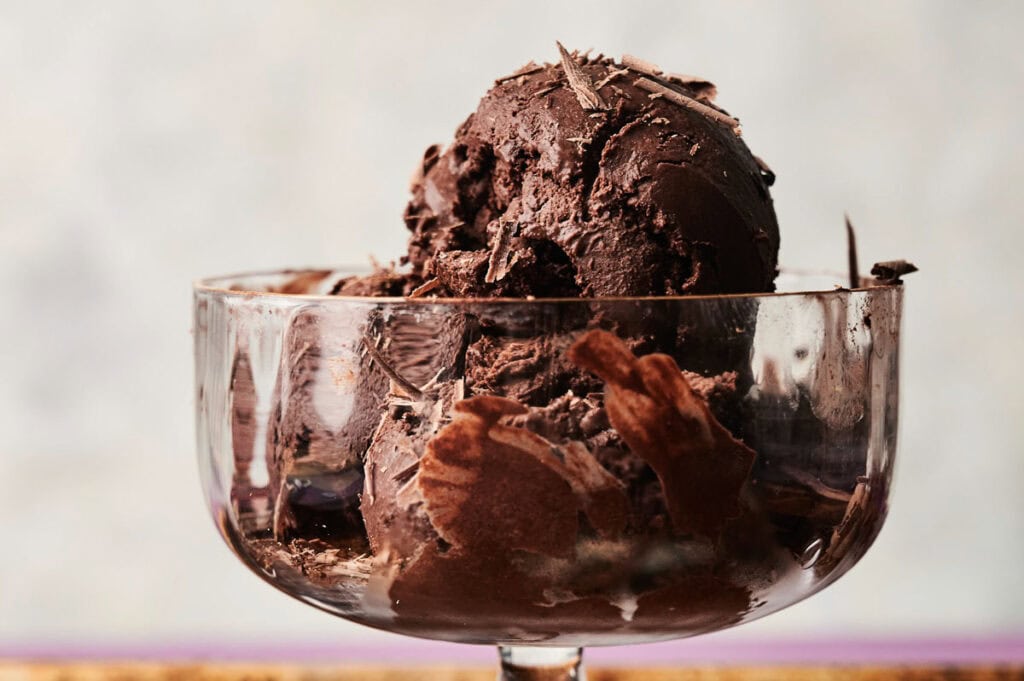
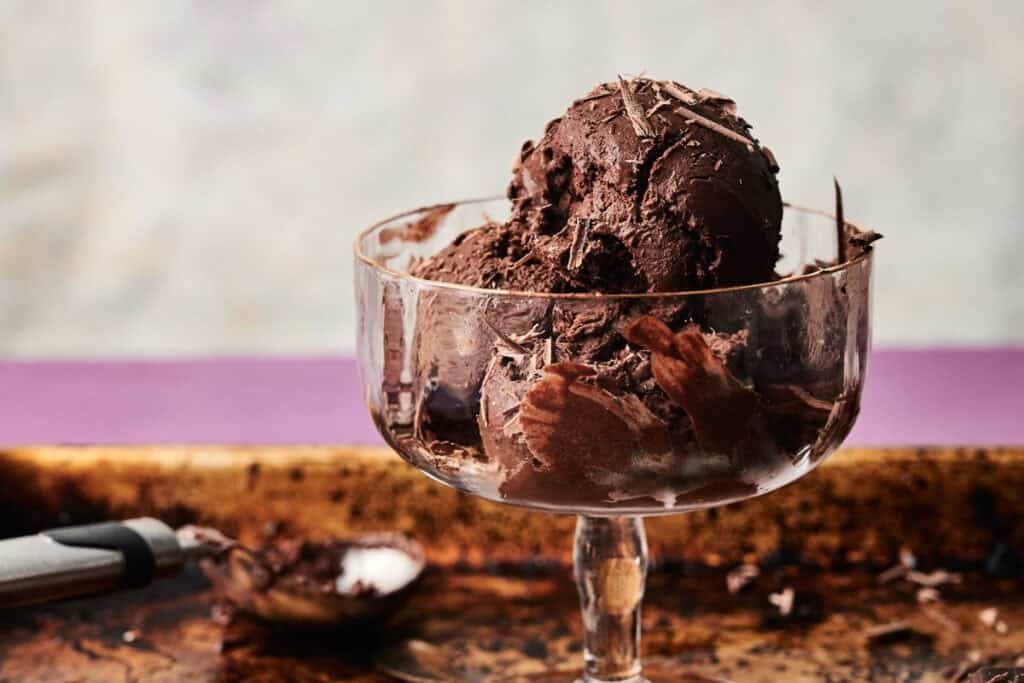
Scoop into bowls or cones and top with dark chocolate chunks or shavings for that extra chocolate flavor. I use this ice cream scoop because it glides through even the firmest scoops.
You could even drizzle your favorite syrup if you have some on hand. If you’re doing cones, I highly recommend using a cone holder stand—it keeps everything upright while you fill and decorate, and honestly, just makes serving way less chaotic.
Recipe Notes and Tips
I’ve made this a few times now, and these little tips make a big difference:
- Use good cocoa powder: Dutch-process cocoa powder or unsweetened cocoa powder gives the richest chocolate flavor.
- Chill the cream: Cold cream helps the mixture churn faster and sets up better in the ice cream maker.
- Soft-serve option: If you can’t wait, serve it right after churning—it’ll be like a creamy soft-serve.
- Add-ins: Chocolate chips, chopped chocolate bars, chopped nuts, or even swirls of caramel or fudge sauce mix in well just before the churn is done.
- No ice cream machine: Pour the mix into a container, freeze, and stir every 30–45 minutes until scoopable. The texture won’t be as creamy but still delicious.
How to Store Leftover Chocolate Ice Cream
Once your milk chocolate ice cream is frozen solid, transfer it to an airtight container and keep it in the coldest part of your freezer. I use an insulated ice cream tub for this, it keeps the ice cream softer and easier to scoop straight from the freezer.
It’s best eaten within 1–2 weeks for the creamiest texture, though technically it’ll last longer. If it gets too hard, let it sit at room temperature for a few minutes before scooping—it’ll soften up nicely without melting.
What to Serve With This Homemade Chocolate Ice Cream Recipe
With it’s rich chocolate flavor, this ice cream is a dream on its own, but it also goes well with a few additions. Try it with warm brownies, a slice of coffee cake, or fresh strawberries on the side.
You can drizzle a little chocolate syrup or top it with whipped cream for a mini sundae treat. If you’re feeling bold, a pinch of sea salt or a spoonful of peanut butter works wonders too.
More Dessert Recipes You Will Love
If you’re into creamy textures and sweet flavors, I’ve got more where that came from:
- Neapolitan Ice Cream
- Ultimate Chocolate Cake Recipe
- Apple Dump Cake
- Cake Mix Chocolate Chip Cookie Bars
- Biscoff Brownies

Equipment
Ingredients
- ¾ cup cocoa powder sifted
- ½ cup granulated sugar
- Pinch salt
- 2 cups heavy cream chilled
- 2 teaspoons vanilla extract
- Dark chocolate to serve
Instructions
- In a medium bowl, whisk together the sifted cocoa powder, sugar, and salt until well combined.¾ cup cocoa powder sifted, ½ cup granulated sugar, Pinch salt
- Stir in the heavy cream and vanilla extract until the mixture is smooth and fully blended.2 cups heavy cream, 2 teaspoons vanilla extract
- Turn on your ice cream maker. Pour the chocolate mixture into the machine and churn according to the manufacturer’s instructions (about 15–20 minutes), until it reaches a soft-serve consistency.
- Transfer the ice cream to an airtight container and freeze for at least 4 hours, or until firm.
- Scoop and serve with dark chocolate chunks or shavings on top for an extra indulgent treat.Dark chocolate
Notes
- Use good cocoa powder: Dutch-process cocoa powder or unsweetened cocoa powder gives the richest chocolate flavor.
- Chill the cream: Cold cream helps the mixture churn faster and sets up better in the ice cream maker.
- Soft-serve option: If you can’t wait, serve it right after churning—it’ll be like a creamy soft-serve.
- Add-ins: Chocolate chips, chopped chocolate bars, chopped nuts, or even swirls of caramel or fudge sauce mix in well just before the churn is done.
- No ice cream machine: Pour the mix into a container, freeze, and stir every 30–45 minutes until scoopable. The texture won’t be as creamy but still delicious.
Storage Instructions
Once your milk chocolate ice cream is frozen solid, transfer it to an airtight container and keep it in the coldest part of your freezer. It’s best eaten within 1–2 weeks for the creamiest texture, though technically it’ll last longer. If it gets too hard, let it sit at room temperature for a few minutes before scooping—it’ll soften up nicely without melting.Nutrition
SERIOUSLY GOOD
DESSERTS!
Dessert First is a collection of 61 RECIPES to show you that you can make beautiful, impressive desserts right in your own kitchen, no matter your skill level.
Immediate eBook download. No physical book available.
Includes ad-free recipes like:
∙ Lemon Pound Cake
∙ Starbucks Cake Pops
∙ Boston Cream Pie
∙ Chocolate Mousse
∙ Matcha Tiramisu
...and much more!
About the Author

Hey there! I’m Mandy
Mandy Applegate is a home cook, food blogger, and writer who believes the best meals are the ones shared with the people you love.
She’s all about easy recipes that taste amazing, the kind that make ordinary days feel a little more special and remind you why cooking at home matters.
She has been published on NBC, the Daily News, the Boston Herald, and the Chicago Sun-Times, amongst many others.