Chocolate Covered Pretzels
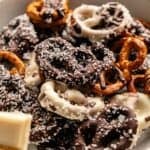
Chocolate Covered Pretzels are one of those snacks that disappear the minute I set them out. The glossy chocolate shell snaps when you bite through it, meeting the perfectly salty, crunchy pretzel inside. That sweet-salty combo is so good you’ll find yourself making them for every occasion.
This post contains affiliate links. As an Amazon Affiliate, if you purchase through those links, I earn a commission. Thank you!
I make them for holidays like Christmas and Valentine’s Day, game-day parties, bake sales, or whenever I need a thoughtful gift. They’re the easy, no-bake treats everyone loves, and they’re perfect for gifting to kids and friends. They stay fresh at room temperature for about a week or in the fridge for up to two weeks.
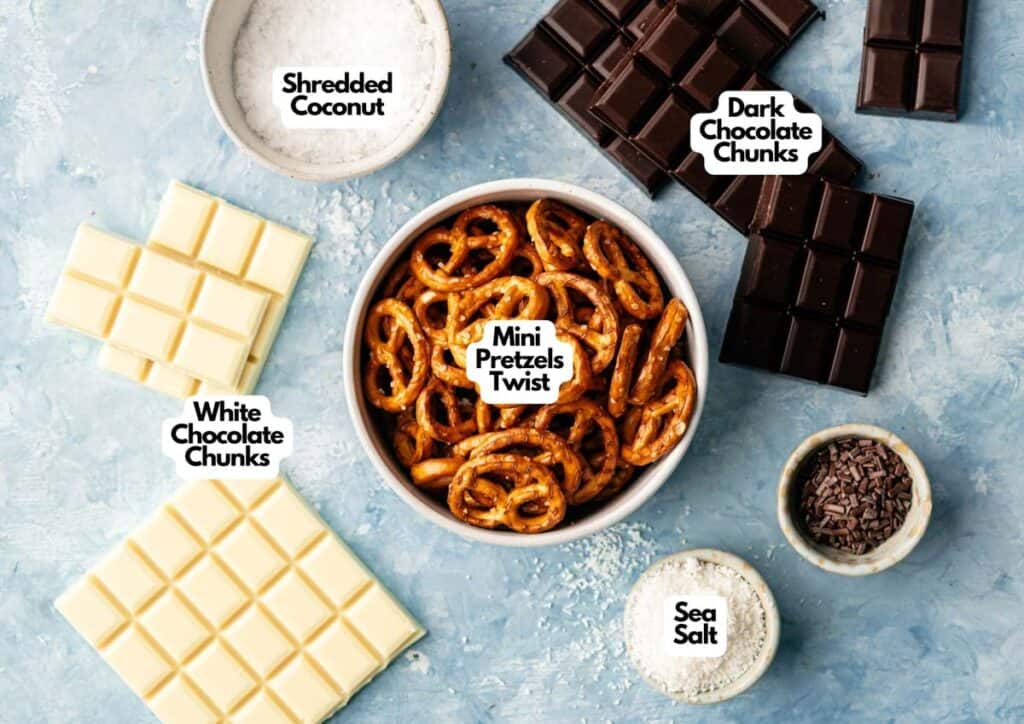
Ingredients You’ll Need
You’ll need all the ingredients shown in the photograph below.
How to Make Chocolate Covered Pretzels with Step-By-Step Instructions
Scroll down for the full recipe card containing a full printable recipe and measurements in both US customary and metric units.
Let’s walk through how to make these sweet-and-salty treats from start to finish.
Prep Your Baking Sheets
Line two baking sheets with parchment paper, wax paper, or silicone baking mats. I like using this silicone baking mat; it’s my favorite for this because it’s reusable, and nothing ever sticks to it.
Having your workspace ready before you start dipping makes the whole process smoother, and the pretzels won’t stick when they’re set.
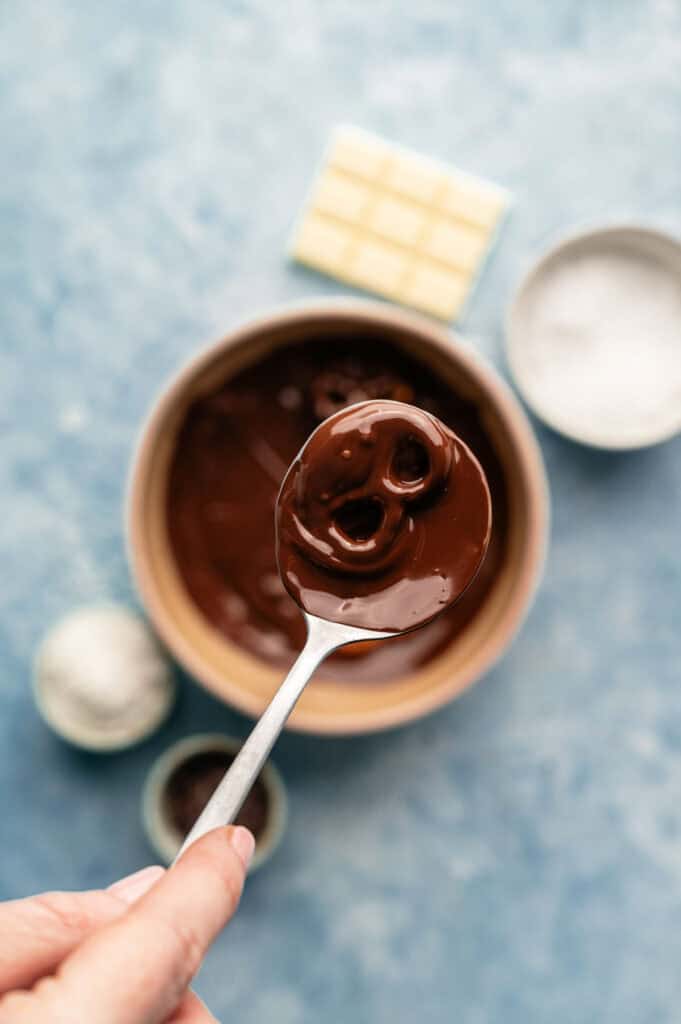
Melt the Chocolate
Place your white or dark chocolate chunks in a microwave-safe bowl. You can also use unsweetened chocolate, milk chocolate, semi-sweet chocolate, or bittersweet chocolate, depending on your preference. Chocolate chips work too, though chunks give a smoother finish.
Microwave on high for 1 minute, then stir well. Continue microwaving in 30-second intervals, stirring between each one, until the chocolate is completely melted and smooth.
You want it fluid enough to coat the pretzels evenly, but not so hot that it burns. If the chocolate seems too thick, stir in a teaspoon of vegetable oil or cocoa butter to thin it out.
Dip the Pretzels
Drop a mini pretzel (or use pretzel rods for a different presentation) into the melted chocolate, then flip it over with a fork to ensure it’s fully coated. Chocolate drips off. A chocolate dipping tool set gives you better control and helps create that professional look.
You want a uniform, even coating without excessive pooling at the bottom. Lift the pretzel out with the fork, then gently tap the fork against the side of the bowl to let any excess.
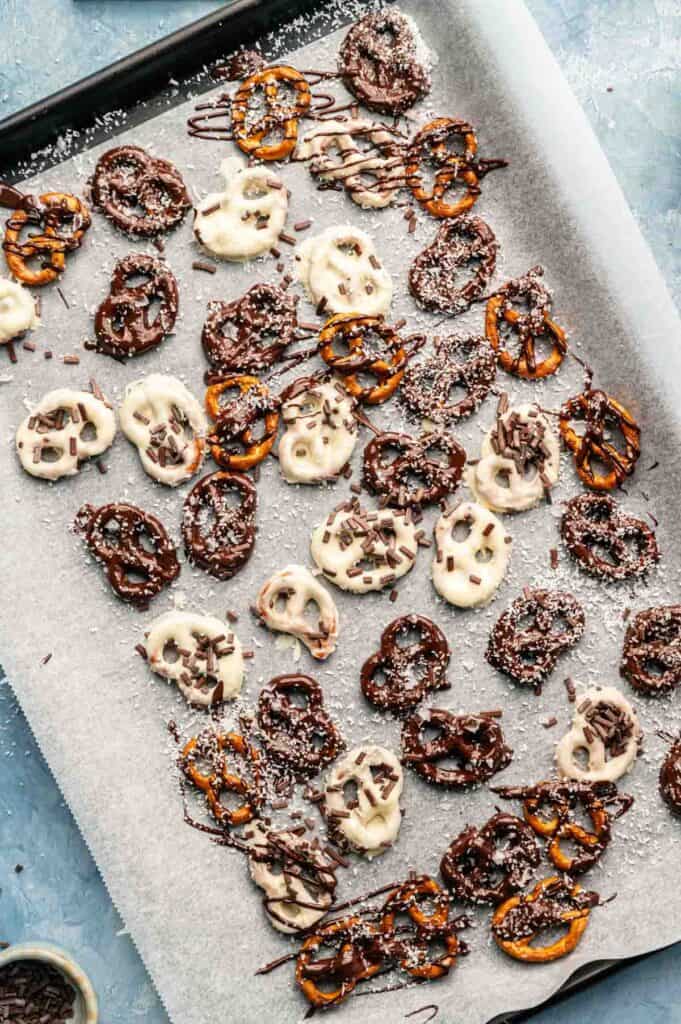
Arrange on Baking Sheets
Place each coated pretzel on your lined baking sheet. Keep them close together to save space, but make sure they’re not touching or they’ll stick together as the chocolate sets. Work quickly while the chocolate is still warm and fluid.
SERIOUSLY GOOD
DESSERTS!
Dessert First is a collection of 61 RECIPES to show you that you can make beautiful, impressive desserts right in your own kitchen, no matter your skill level.
Immediate eBook download. No physical book available.
Includes ad-free recipes like:
∙ Lemon Pound Cake
∙ Starbucks Cake Pops
∙ Boston Cream Pie
∙ Chocolate Mousse
∙ Matcha Tiramisu
...and much more!

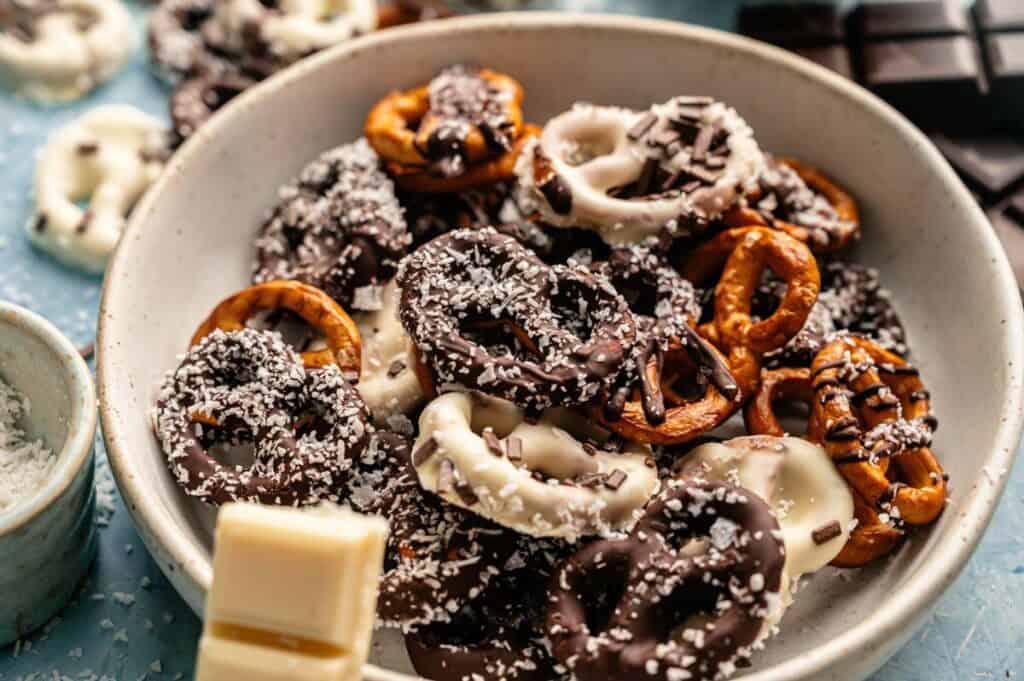
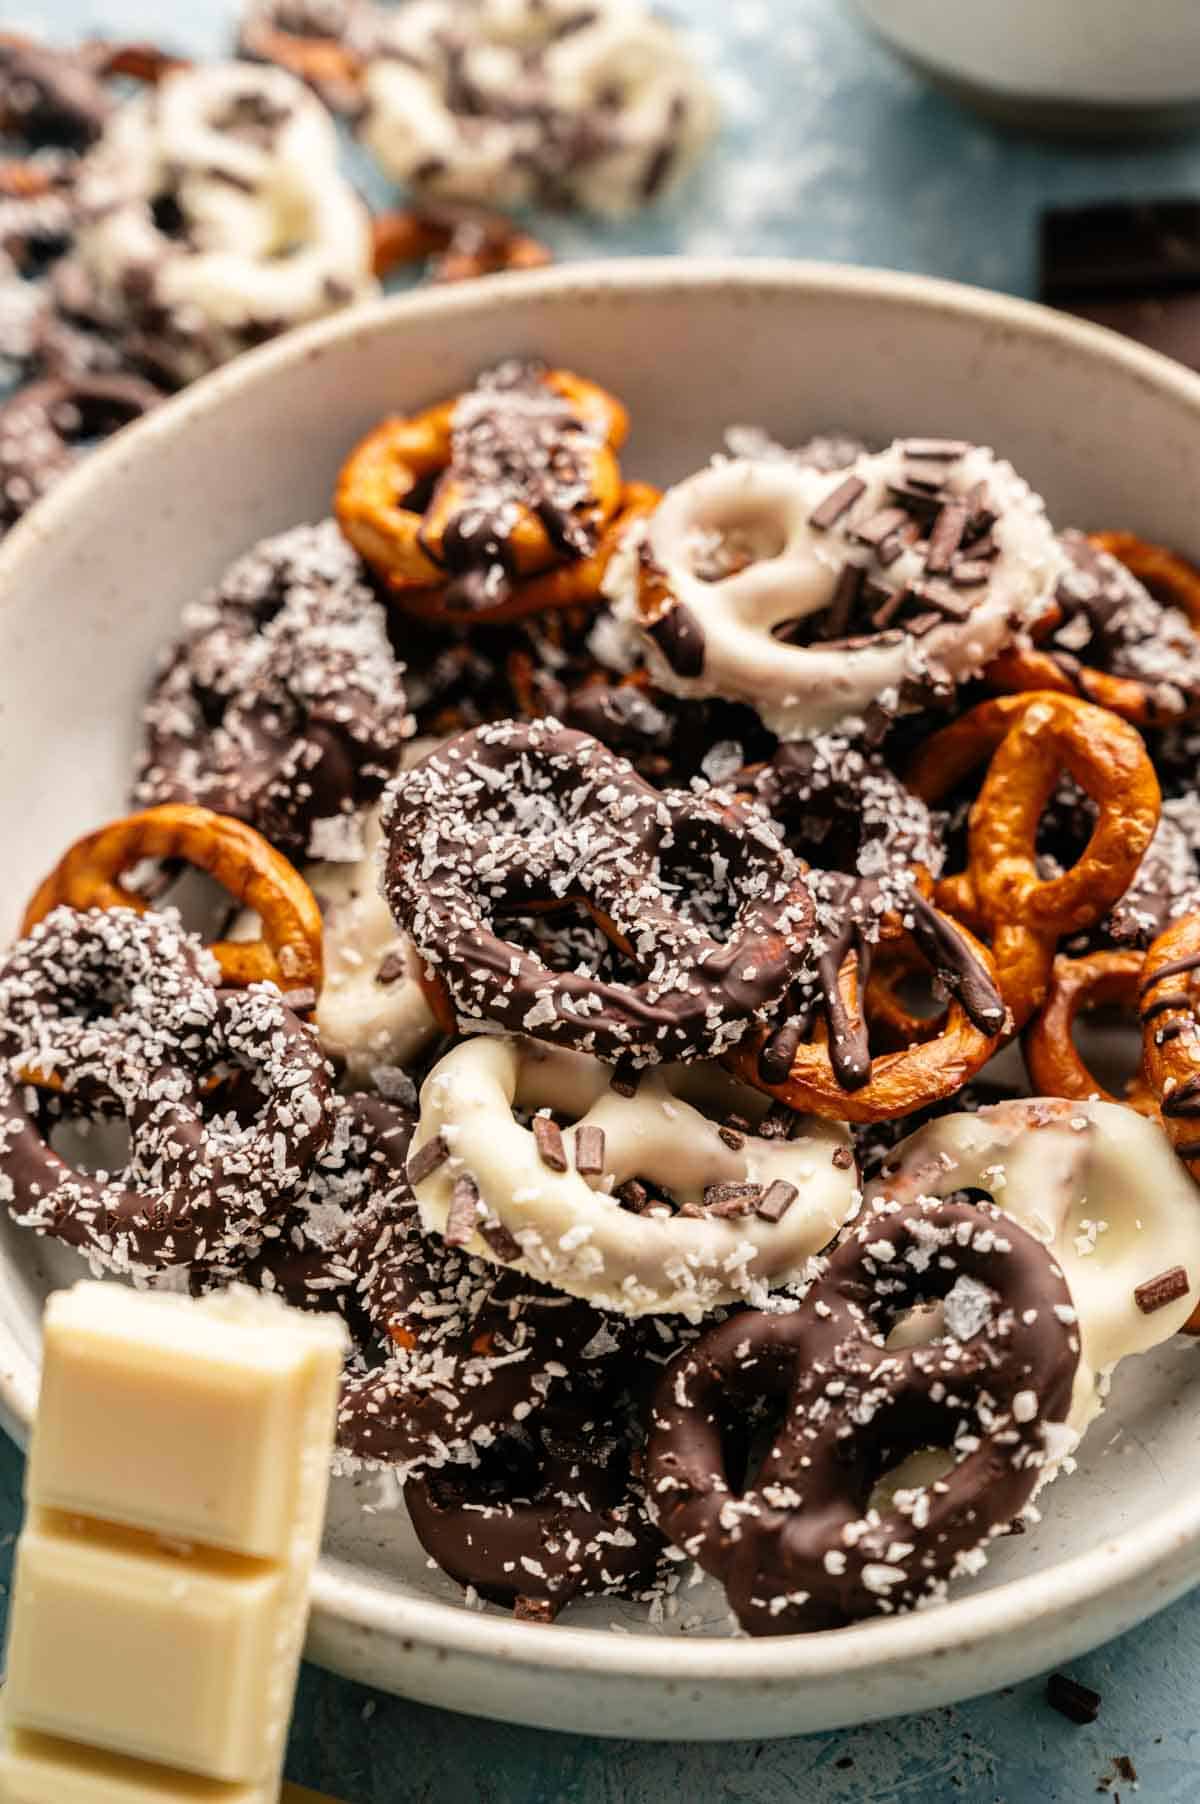
Add Your Toppings
Sprinkle with shredded coconut, flaky salt, chopped nuts, colorful sprinkles, or crushed candy canes, or drizzle with more melted chocolate while the base coating is still wet. The toppings need to stick to the chocolate before it hardens, so don’t wait too long.
Use a piping bag for clean chocolate drizzles for a festive, fancy look.
Let Them Set
Allow the chocolate pretzels to set at room temperature for about 30 minutes, or refrigerate them for 10 to 15 minutes if you need them faster. The chocolate will firm up and develop that satisfying snap when you bite into it.
Once they’re completely set, transfer them to storage and enjoy! Save any leftover chocolate or excess chocolate for another batch.
Serve or Package Them
Once the chocolate-covered pretzels are completely set, they’re ready to enjoy or gift. These homemade treats make delicious gifts. I like using this gift box with a clear window, which is perfect for creating beautiful homemade gift packages and making the gift more fun to eat.
I also love arranging the mini twists on this tiered porcelain tray stand for parties or packing them in cellophane bags tied with ribbon for gifts.
Ingredients
- 1 cup white chocolate chunks
- 1 cup dark chocolate chunks
- 3 cups mini pretzel twists
Topping Options:
- Shredded coconut
- Flaky salt
- Melted chocolate for drizzling
Instructions
- Line 2 baking sheets with parchment paper, wax paper, or silicone mats.
- Place the white or dark chocolate chunks in a microwave-safe bowl. Microwave on HIGH for 1 minute, stir, then continue microwaving in 30-second intervals until fully melted and smooth.1 cup white chocolate chunks, 1 cup dark chocolate chunks
- Drop a mini pretzel into the melted chocolate and flip with a fork to coat. Lift the pretzel out and tap the fork on the bowl to remove excess chocolate.3 cups mini pretzel twists
- Place the coated pretzel on the prepared baking sheet. Repeat with the remaining pretzels, keeping them close but not touching.
- Add your toppings (coconut, flaky salt, or drizzle more chocolate).Shredded coconut, Flaky salt, Melted chocolate
- Let the pretzels set at room temperature or refrigerate them for faster setting.
Video
Notes
- Use quality chocolate: Chocolate chips work, but chocolate chunks or melting wafers give you a smoother, glossier finish that sets with a better snap.
- Don’t overheat the chocolate: Stir between each microwave interval and stop as soon as it’s fully melted. Overheated chocolate can seize up or become grainy.
- Work in small batches: Melt one type of chocolate at a time and dip about 10 to 15 pretzels before the chocolate starts to thicken. Reheat briefly if needed.
- Add toppings immediately: Sprinkle or drizzle toppings while the chocolate is still wet. Once it starts to set, toppings won’t stick properly.
- Keep them cool: Store chocolate-covered pretzels away from heat sources. Chocolate can bloom (develop a white coating) or soften if exposed to warm temperatures.
- Prevent sticking during storage: Flash-freeze the pretzels on a baking sheet for 30 minutes, then transfer them to a container so they don’t stick together.
Nutrition
SERIOUSLY GOOD
DESSERTS!
Dessert First is a collection of 61 RECIPES to show you that you can make beautiful, impressive desserts right in your own kitchen, no matter your skill level.
Immediate eBook download. No physical book available.
Includes ad-free recipes like:
∙ Lemon Pound Cake
∙ Starbucks Cake Pops
∙ Boston Cream Pie
∙ Chocolate Mousse
∙ Matcha Tiramisu
...and much more!
How to Store Leftovers
Store your chocolate-covered pretzels in an airtight container at room temperature for up to a week. Layer them between sheets of parchment paper when stacking to prevent sticking. They’ll stay fresh and won’t get sticky as long as you keep them away from heat and humidity.
For longer storage, refrigerate them for up to two weeks or freeze them for up to two months. Freezer-safe storage containers with tight-sealing lids are effective at preventing freezer burn.
Let them come to room temperature for about 10 minutes before serving so the chocolate isn’t too hard and the flavors come through fully.
What to Serve With Chocolate Covered Pretzels
Serve these on a dessert board with fresh fruit, mixed nuts, cheese, and chocolate bars or other homemade treats for an elegant spread. They’re also perfect with coffee, hot chocolate, or a glass of cold milk for an afternoon snack.
Set them out during movie nights with popcorn and candy, or pack them in gift boxes with homemade cookies and fudge. They’re the kind of versatile treat that works well at any gathering or makes a thoughtful homemade gift on its own.
More Easy Recipes for You to Try at Home
Check out these other easy chocolate desserts.
- Chocolate Peanut Butter Rice Krispies
- Oatmeal Chocolate Chip Cookies
- Chocolate Croissant
- Chocolate Covered Apple Slices
- Cake Mix Chocolate Chip Cookie Bars
About the Author

Hey there! I’m Mandy
Mandy Applegate is a home cook, food blogger, and writer who believes the best meals are the ones shared with the people you love.
She’s all about easy recipes that taste amazing, the kind that make ordinary days feel a little more special and remind you why cooking at home matters.
She has been published on NBC, the Daily News, the Boston Herald, and the Chicago Sun-Times, amongst many others.